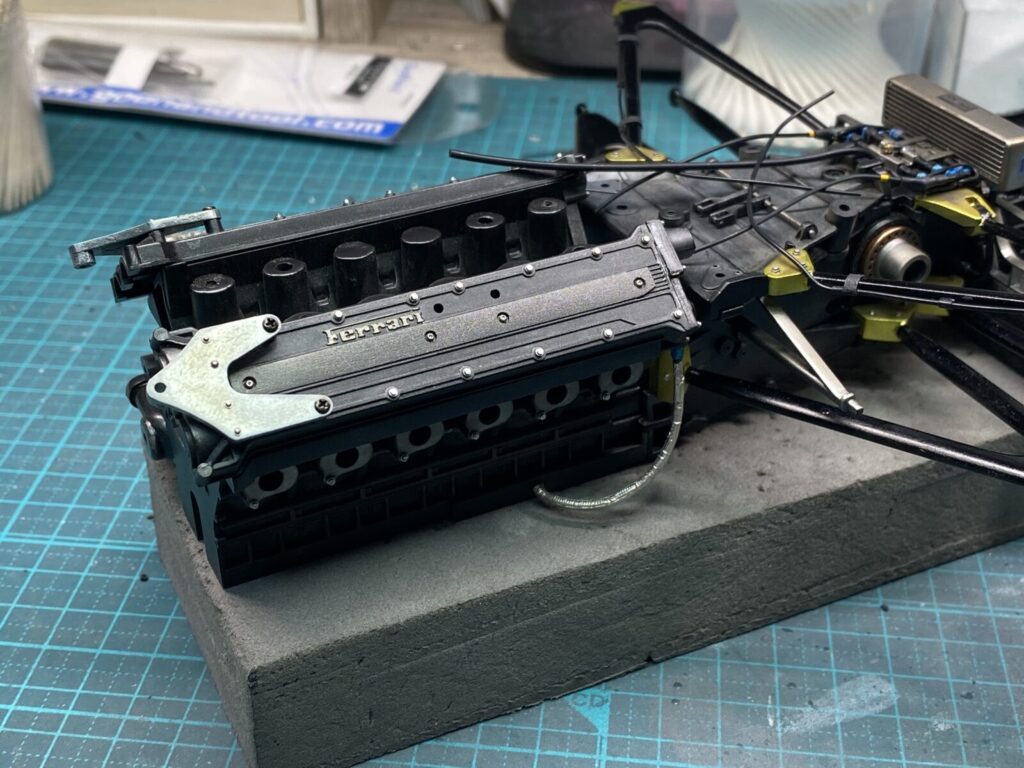
まずは、エキゾーストフランジにボルトを追加していきます。
完成後はあまり目立たなくなる部分ではありますが、一つひとつ取り付けることでエンジン周辺の精密感を高めていきます。
The first step is to add the mounting bolts to the exhaust flanges.
Although they will not be particularly noticeable once the model is fully assembled, adding them individually helps increase the level of detail and realism around the engine.

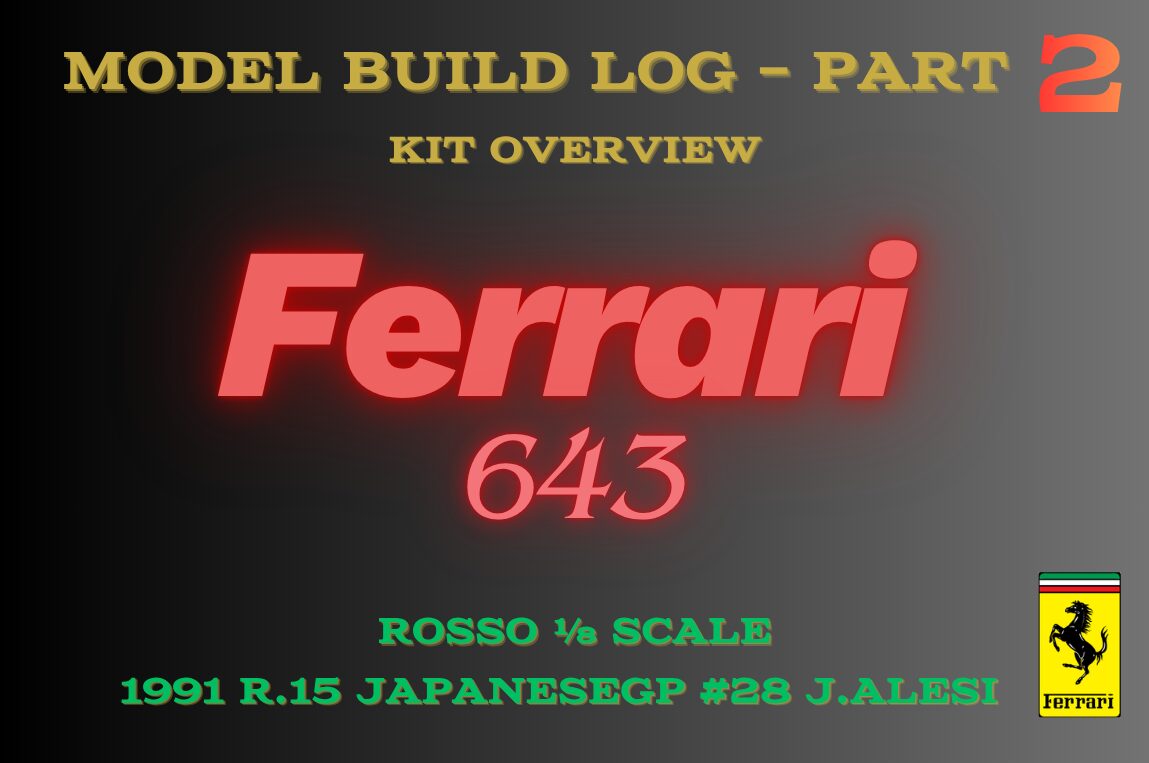
このキットでは配線やホース類が一切再現されていません。
そこで、ホースジョイントは別パーツや自作したパーツを使用し、ホース類も追加していきます。実車資料を参考にしながら、できる限り実車に近いレイアウトを再現する予定です。
The kit does not include any of the wiring or hose details in this area.
To address this, the hose fittings will be reproduced using aftermarket and scratch-built parts, and the missing hoses will also be added. Using reference photos of the real car, the layout will be recreated as accurately as possible.
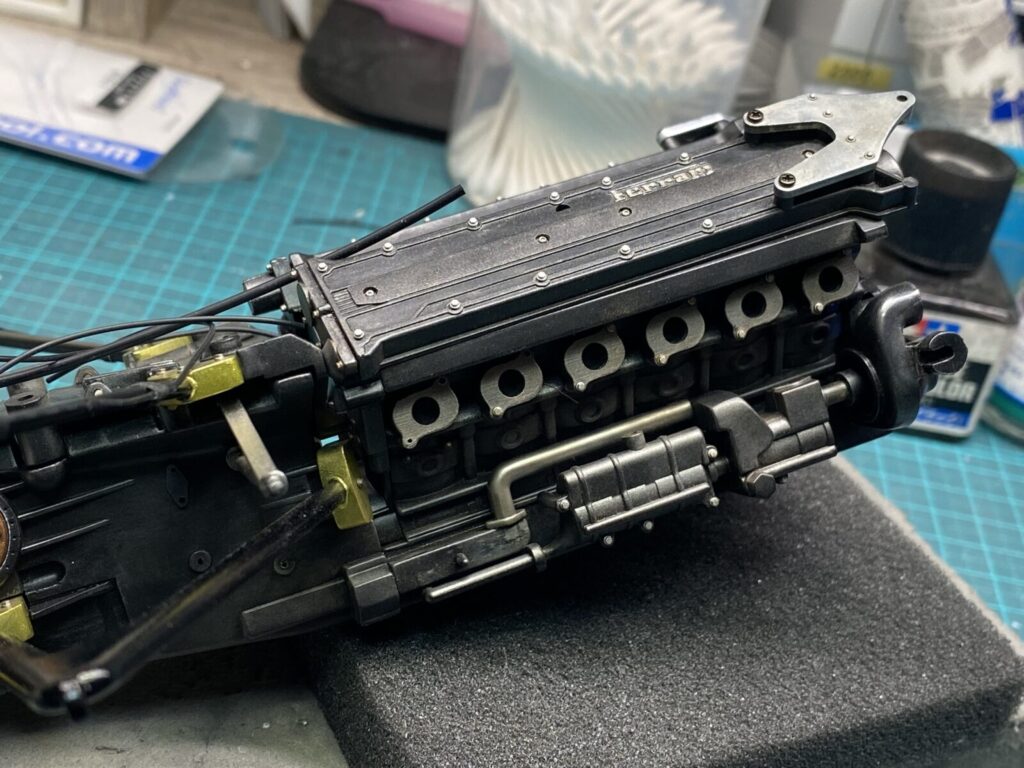
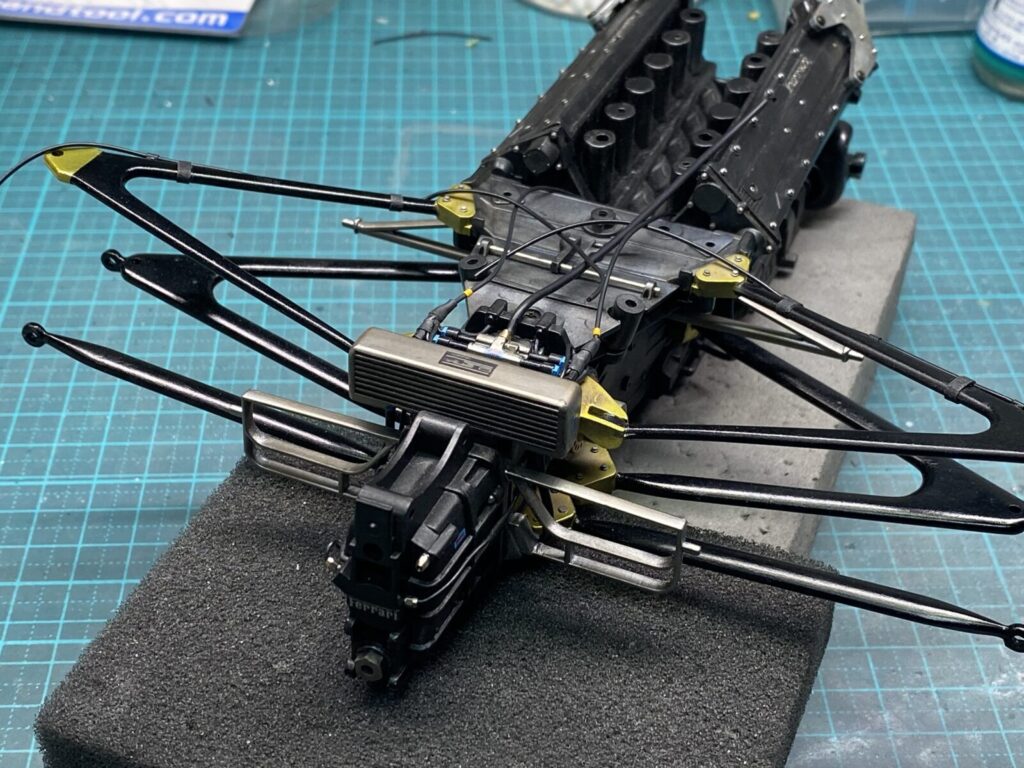
製作したホースを仮組みしながら接続していきます。
この段階では長さや取り回し、各ジョイントとの位置関係を確認しながら作業を進め、最終的な固定に向けて調整を行っていきます。
The fabricated hoses are temporarily fitted and connected to check the overall layout.
At this stage, the routing, length, and alignment with each fitting are carefully evaluated before the final installation is carried out.
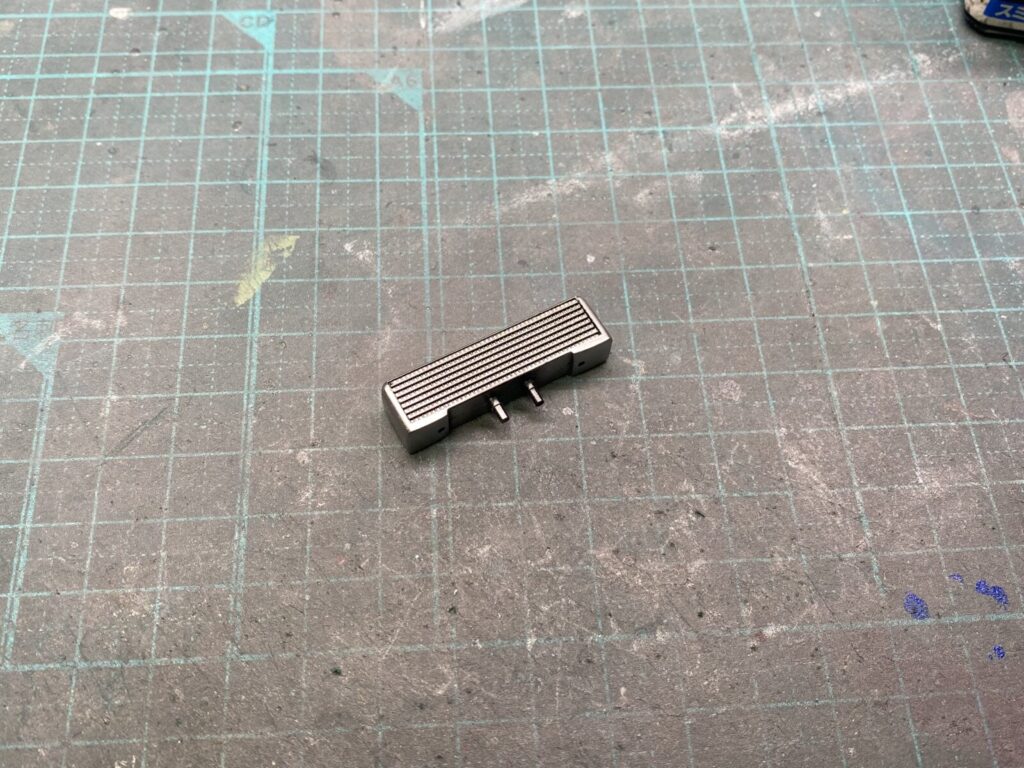
ミッションオイルクーラーの製作を進めます。
まずはメッキを剥離し、パーティングラインを除去した後、表面を整えるための下地処理を施していきます。
Work now begins on the transmission oil cooler.
The chrome plating is first removed, followed by the elimination of mold seams and the necessary surface preparation to create a clean and smooth surface for the next stages of work.
下地処理が完了したらシルバーを吹き付け、スミ入れや塗装表現によって陰影を加えていきます。
単調な仕上がりにならないよう立体感を強調し、オイルクーラーらしい金属の質感を表現していきます。
Once the surface preparation is complete, a coat of silver is applied, followed by shading to enhance the depth and detail of the part.
The contrast helps bring out the three-dimensional structure and gives the oil cooler a more realistic metallic appearance.

オイルクーラーについても同様にホースを自作し、各部へ追加していきます。
ホースの太さや取り回しにも注意しながら組み付けを行い、実車らしい密度感のある仕上がりを目指します。
As with the other assemblies, custom-made hoses are added to the oil cooler.
Careful attention is paid to the hose diameter and routing to recreate the dense, functional appearance seen on the real car.
完成したオイルクーラーを本体へ取り付け、あわせて製作しておいたホースも接続していきます。
各ホースの取り回しや位置関係を確認しながら組み付けを行い、実車らしいレイアウトとなるよう仕上げていきます。
The completed oil cooler is installed on the main assembly, and the previously fabricated hoses are connected.
Careful attention is paid to the routing and positioning of each hose to reproduce the layout and appearance of the real car as accurately as possible.
先ほど仮組みしておいたホースに耐熱シールを巻き付け、本固定を行います。
実車の雰囲気を意識しながら処理を施すことで、見た目の密度感だけでなく、より機能的な印象を演出するようにします。
The hoses that were previously test-fitted are now secured permanently, with heat-resistant tape applied where required.
By incorporating these details with the appearance of the real car in mind, the goal is to enhance not only the visual density of the assembly but also its functional character.