こちらは下地処理を行った後、あらかじめ調合しておいたベースカラーで塗装したカムカバーです。
ヒケの修正後に塗装を行い、その後は数週間あえて保管して様子を見ていましたが、塗膜の痩せやヒケの再発は見られませんでした。問題がないことを確認できたので、組み立て作業を進めていきます。
These are the cam covers that were painted using a custom-mixed base color after the necessary surface preparation had been completed.
After correcting the sink marks, the parts were painted and then deliberately left aside for several weeks. No signs of paint shrinkage or the sink marks reappearing were found, so assembly can now begin with confidence.
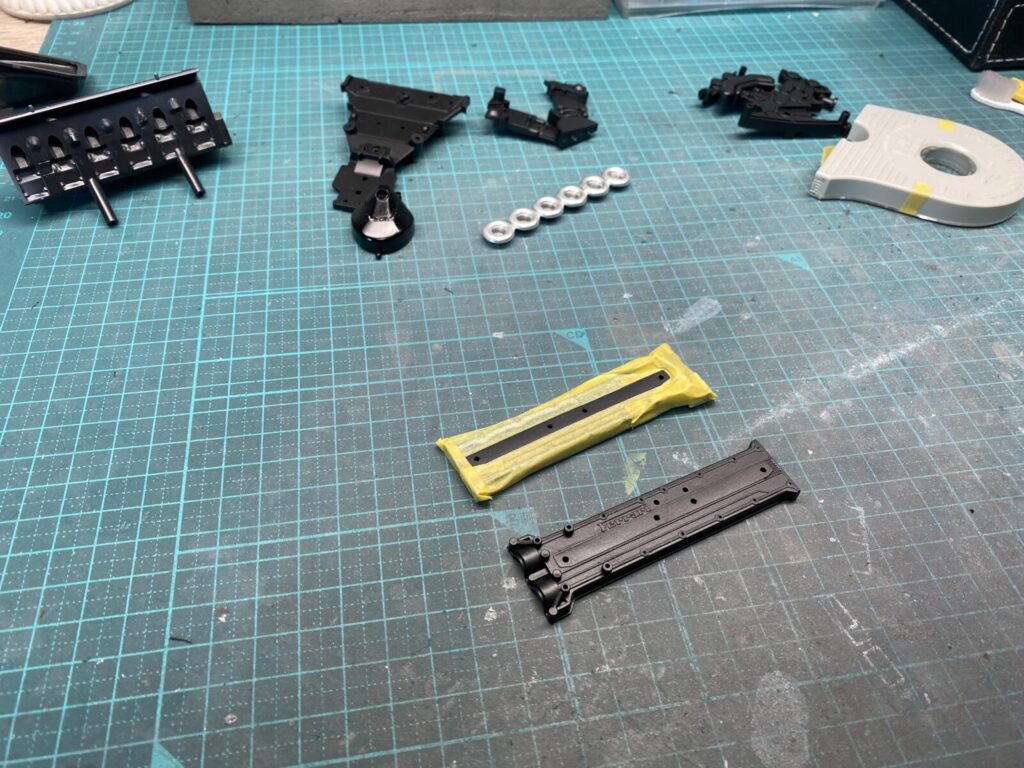
まずはカムカバーの一部を塗り分けるため、マスキング作業を行います。
境界部分がシャープに仕上がるようマスキングテープを丁寧に貼り込み、塗装の準備を進めていきます。
The first step is to mask off selected areas of the cam covers for the two-tone paint finish.
Masking tape is carefully applied to ensure clean, sharp paint boundaries before moving on to the next stage of painting.
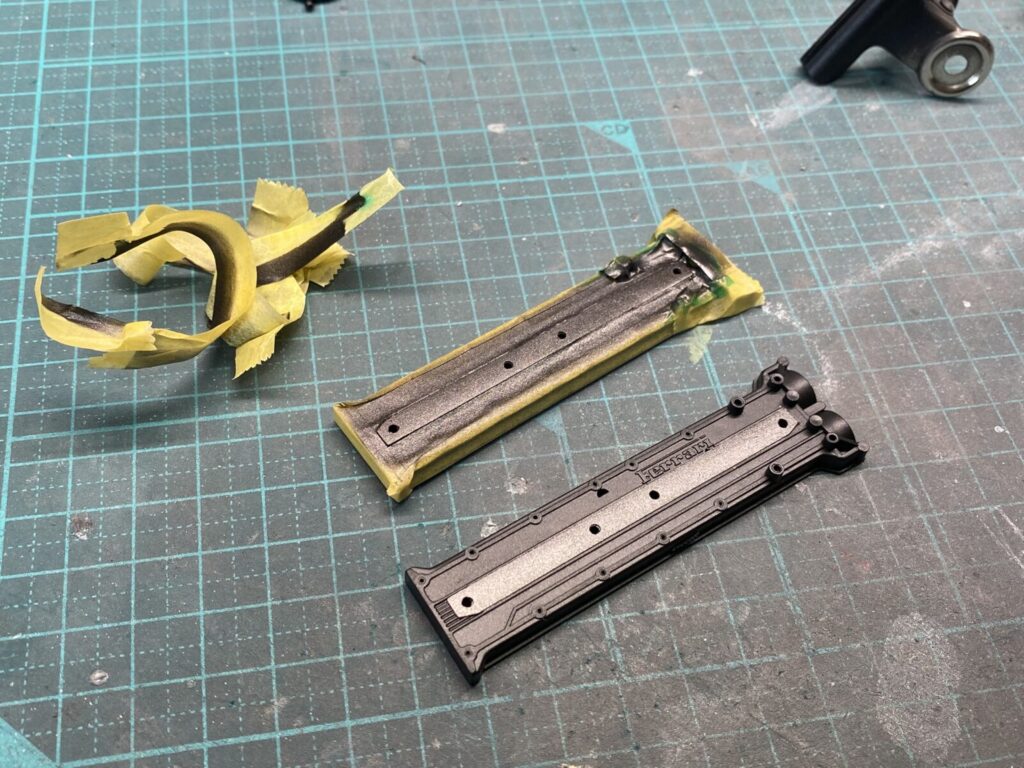
その後塗装を行い、塗膜を傷めないよう注意しながらマスキングを慎重に剥がしていきます。
塗り分け部分も狙い通りに仕上がり、カムカバーらしいメリハリのある表情になりました。
The parts are then painted, and the masking is carefully removed to avoid damaging the finish.
The paint separation turned out as intended, giving the cam covers the crisp, well-defined appearance seen on the real engine.
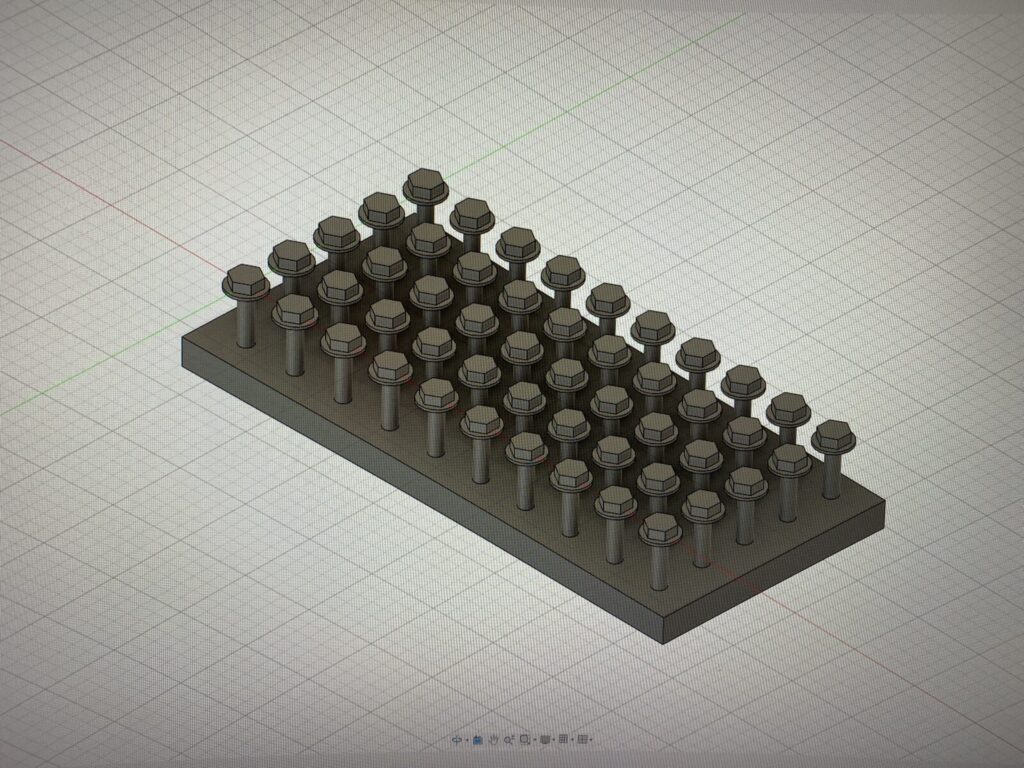
使用するボルト類も3D CADで設計し、3Dプリンターで製作しておきます。
市販パーツでは再現が難しいサイズや形状にも対応できるため、実車に近いディテールを再現することができます。
The required bolts are also designed in 3D CAD and produced using a 3D printer.
This approach makes it possible to reproduce sizes and shapes that would be difficult to achieve with commercially available parts, allowing for a more accurate representation of the real car’s details.
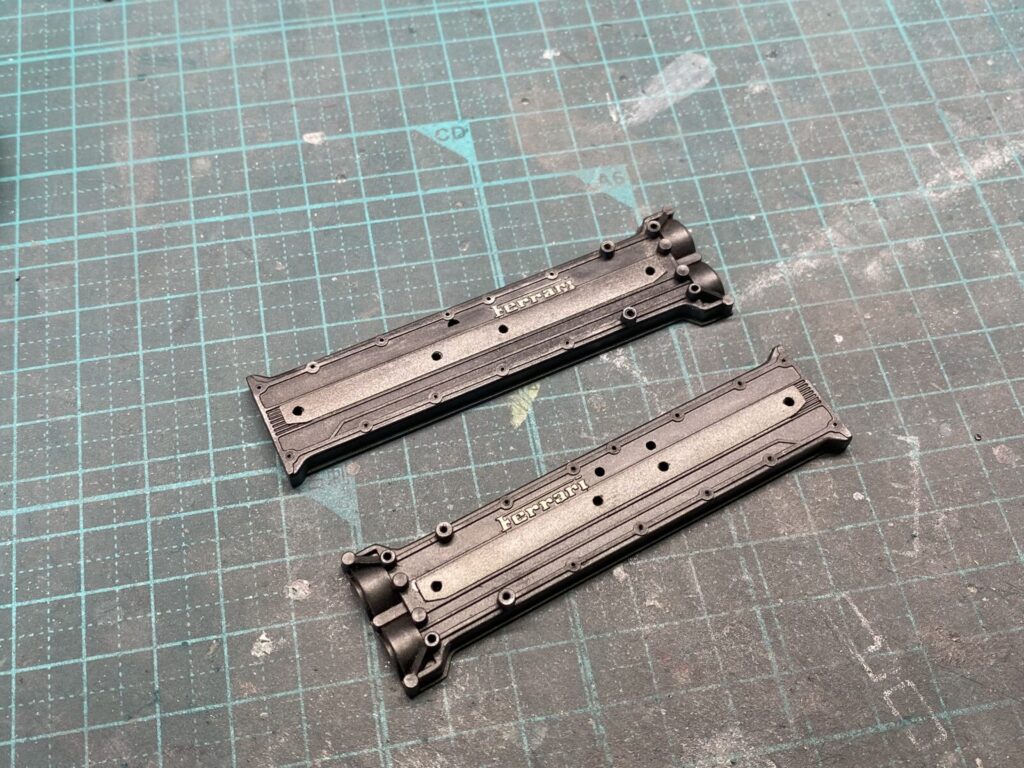
日本GP仕様の資料を見る限り、Ferrariロゴはヘッドカバーとほぼ同色に見えます。しかし、現時点ではディテールを確認しやすいよう、あえてシルバーで塗装しています。
最終的には実車に合わせて同色で仕上げるか、あるいはわずかにトーン差を付けてロゴを際立たせるか、全体のバランスを見ながら判断する予定です。
Based on the reference photos from the Japanese Grand Prix, the Ferrari logos appear to be finished in almost the same color as the cam covers themselves. For now, however, I have painted them in silver to make the details stand out more clearly.
The final decision will be made later, either matching the logos to the cam cover color as on the real car or keeping a subtle tonal contrast to highlight the lettering while maintaining the overall balance of the model.
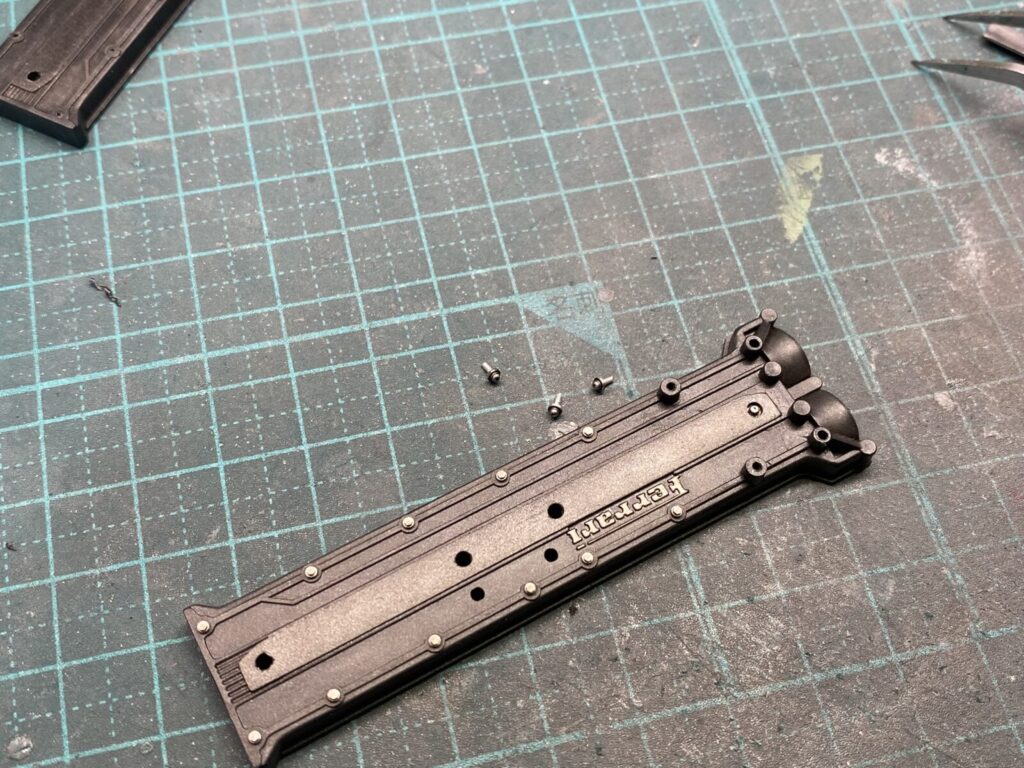
続いて、カムカバーにボルトを追加していきます。
Next, the cam covers are detailed with additional bolts.
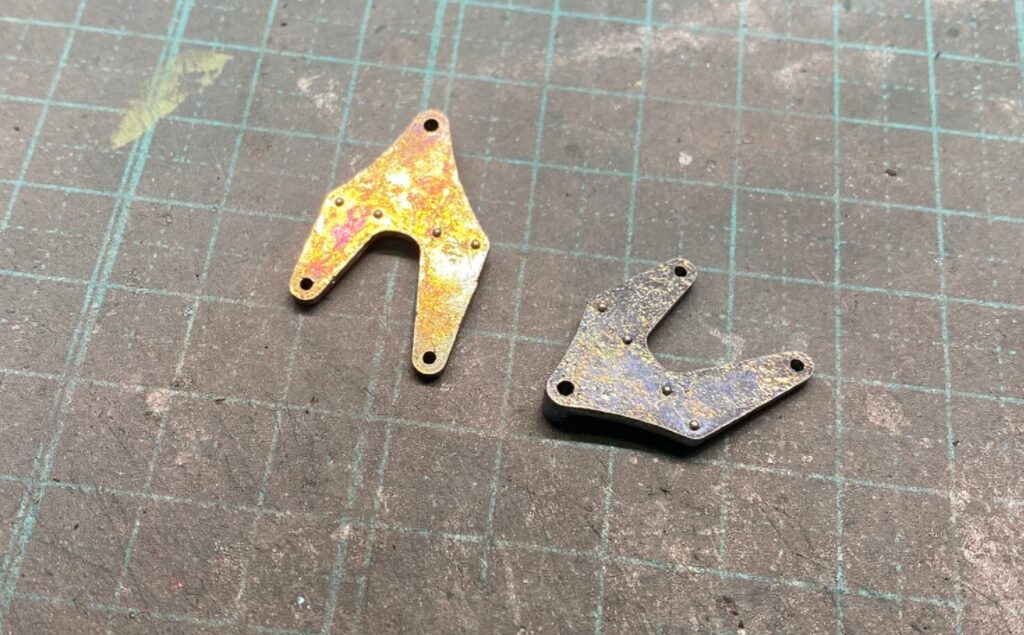
エンジンマウントブラケットは経年変化による表面の腐食が見られたため、磨き出しを行って表面を整えていきます。
素材の状態を確認しながら少しずつ研磨を進め、滑らかで均一な仕上がりを目指します。
The engine mount brackets showed signs of surface corrosion caused by age, so they were carefully polished to restore a clean finish.
The surface was gradually refined while monitoring the condition of the material, resulting in a smoother and more uniform appearance.
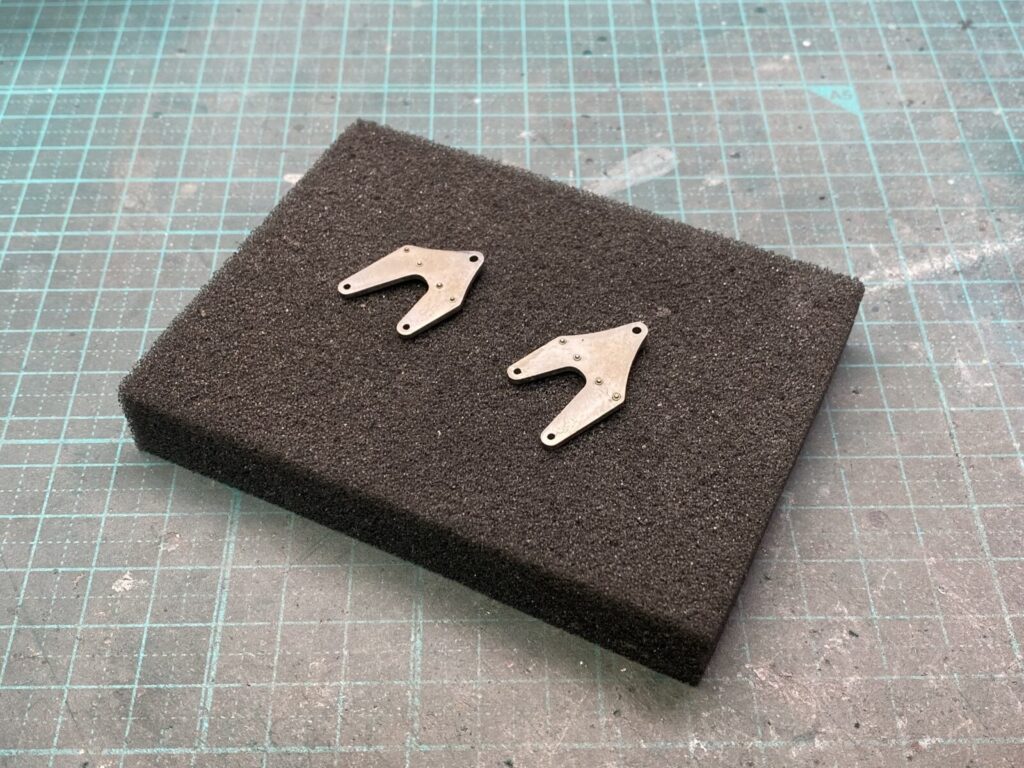
表面処理を行い、腐食していた部分の修正が完了しました。
さらにリベットを追加してディテールアップを行います。その後、プライマーを吹いて塗装の下地を整え、最後にクリアーコートで表面を保護しておきます。
The surface preparation is now complete, and the areas affected by corrosion have been fully restored.
Additional rivets are then added to enhance the detail. Once this work is finished, a coat of primer is applied to prepare the surface for painting, followed by a clear coat to protect the finish.
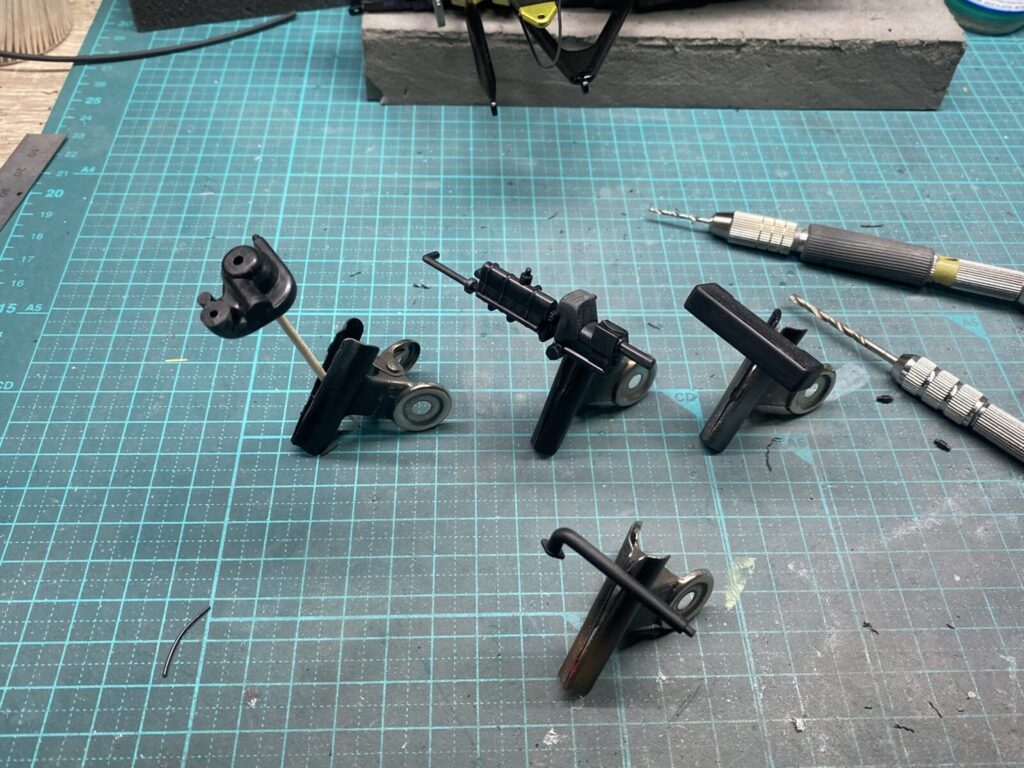
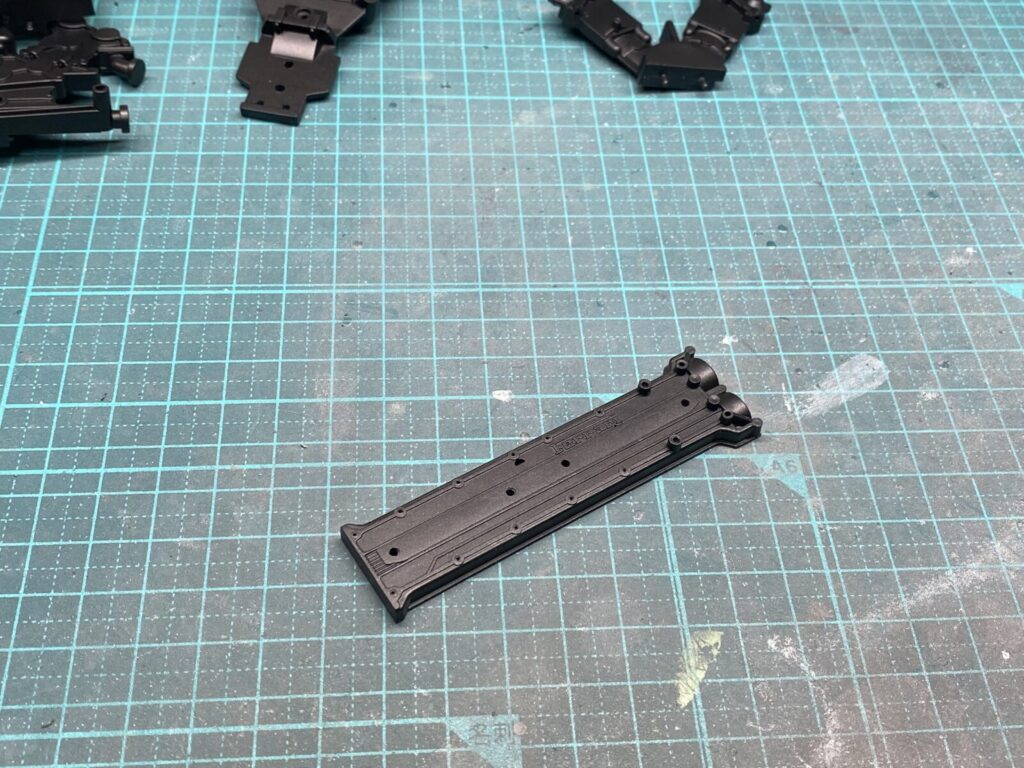
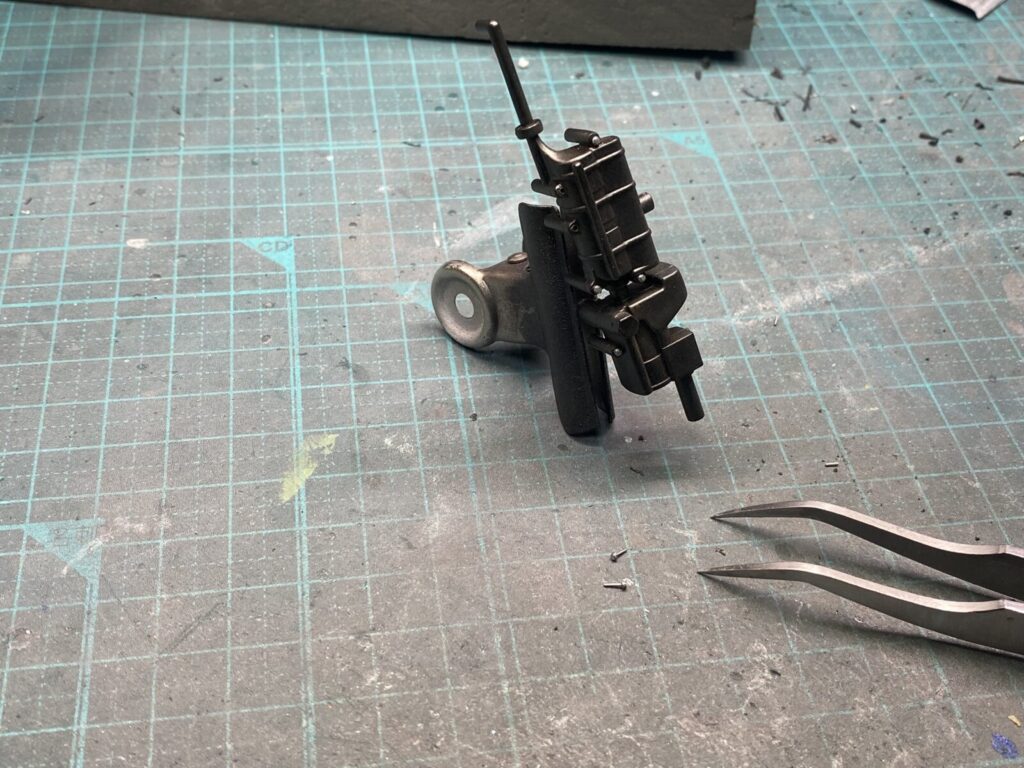
カムカバーを取り付ける前に、ギアボックス油圧制御ユニットの製作を進めます。
まずはメッキパーツのメッキを剥離し、パーティングラインの除去や表面の修正など、基本的な下地処理を行っていきます。
Before installing the cam covers, work begins on the gearbox hydraulic control unit.
The first step is to strip the chrome plating from the plated parts and carry out the necessary surface preparation, including mold seam removal and refinement of the part surfaces.
各パーツは素材ごとの質感が伝わるよう塗り分けを行い、表面処理によってさらに仕上がりを高めていきます。
あわせてボルト類を追加し、実車らしい密度感と精密感を表現していきます。
Each component is painted separately to reproduce the distinct appearance of the different materials, while additional surface finishing work is carried out to further enhance the overall realism.
Additional bolts are also fitted to increase the level of detail and capture the dense, mechanical look of the real assembly.
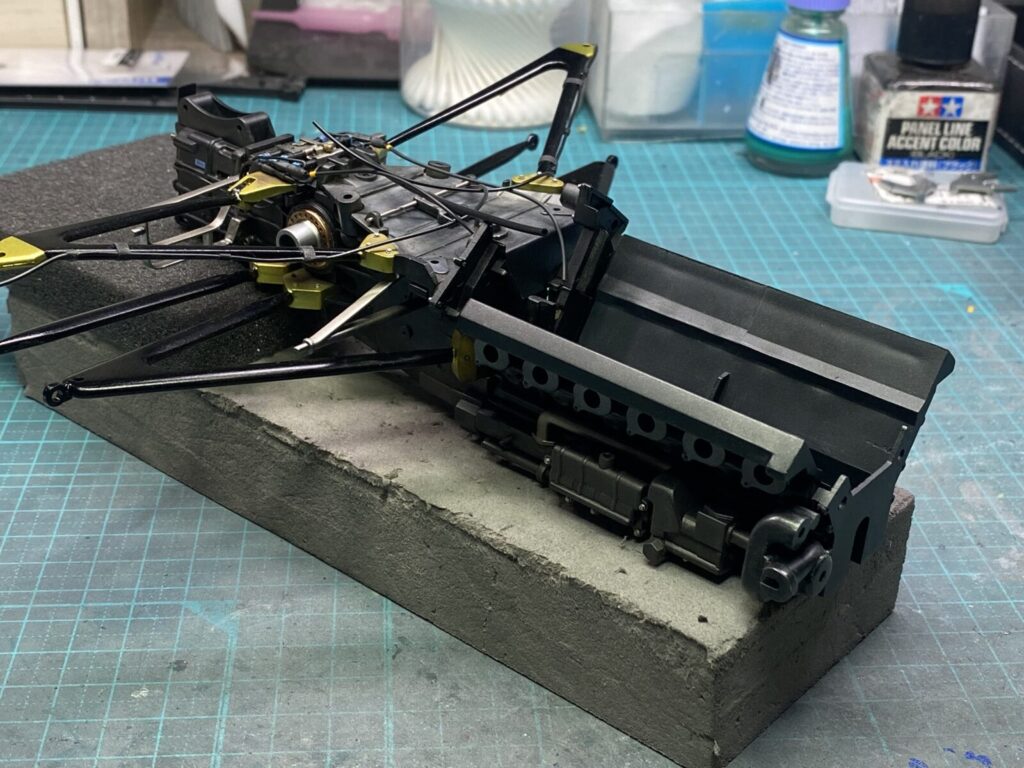
完成した油圧制御ユニットを本体へ取り付けます。
実車資料を参考にしながら位置関係を確認し、出来るだけ正確なレイアウトとなるよう組み付けを行いました。
The completed hydraulic control unit is then installed on the main assembly.
Using reference photos of the real car, the unit is positioned as accurately as possible to reproduce the correct layout and overall appearance.
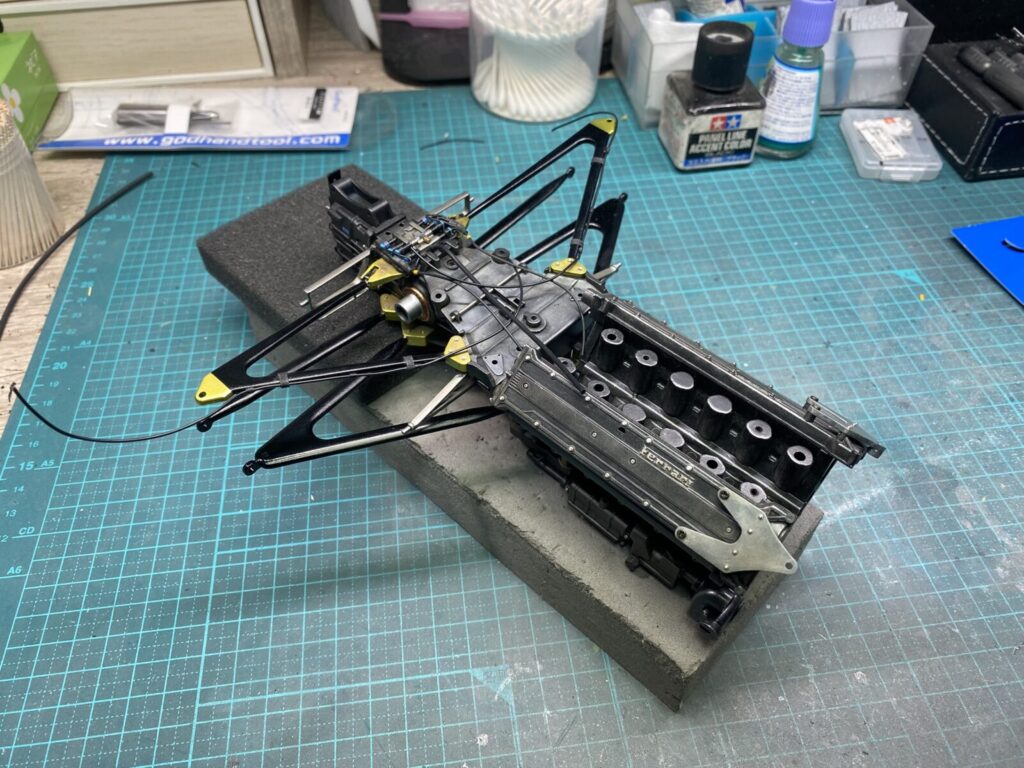
製作しておいたカムカバーとエンジンマウントブラケットを組み立てていきます。
それぞれの位置関係を確認しながら慎重に組み付けを行い、エンジン周辺のディテールを少しずつ完成へと近づけていきます。
The previously completed cam covers and engine mount brackets are now assembled.
Careful attention is paid to the alignment and positioning of each component as the assembly progresses, gradually bringing the engine area closer to its final appearance.
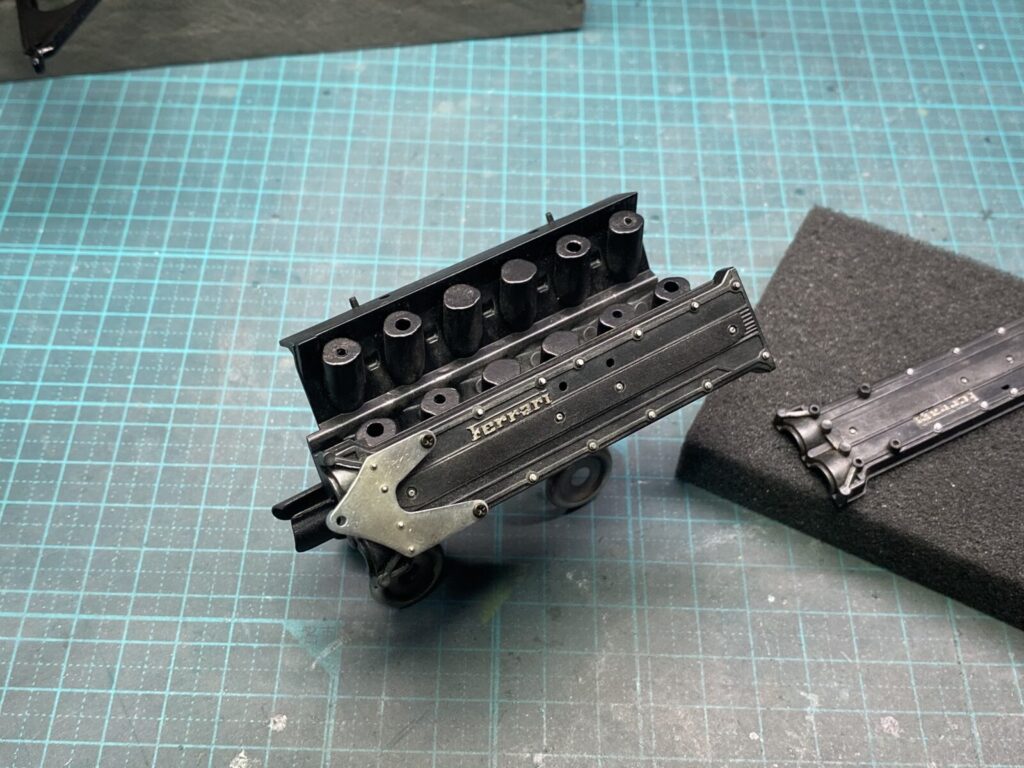
カムカバーをエンジンブロックへ取り付けました。
現時点では基本的な組み立てまでとし、カムカバー周辺の配線や補機類については、後の工程で資料を参考にしながら徹底的に追加していく予定です。
The cam covers have now been installed on the engine block.
At this stage, only the basic assembly has been completed. The wiring and auxiliary components around the cam covers will be added in a later stage, using reference material to reproduce the area in as much detail as possible.