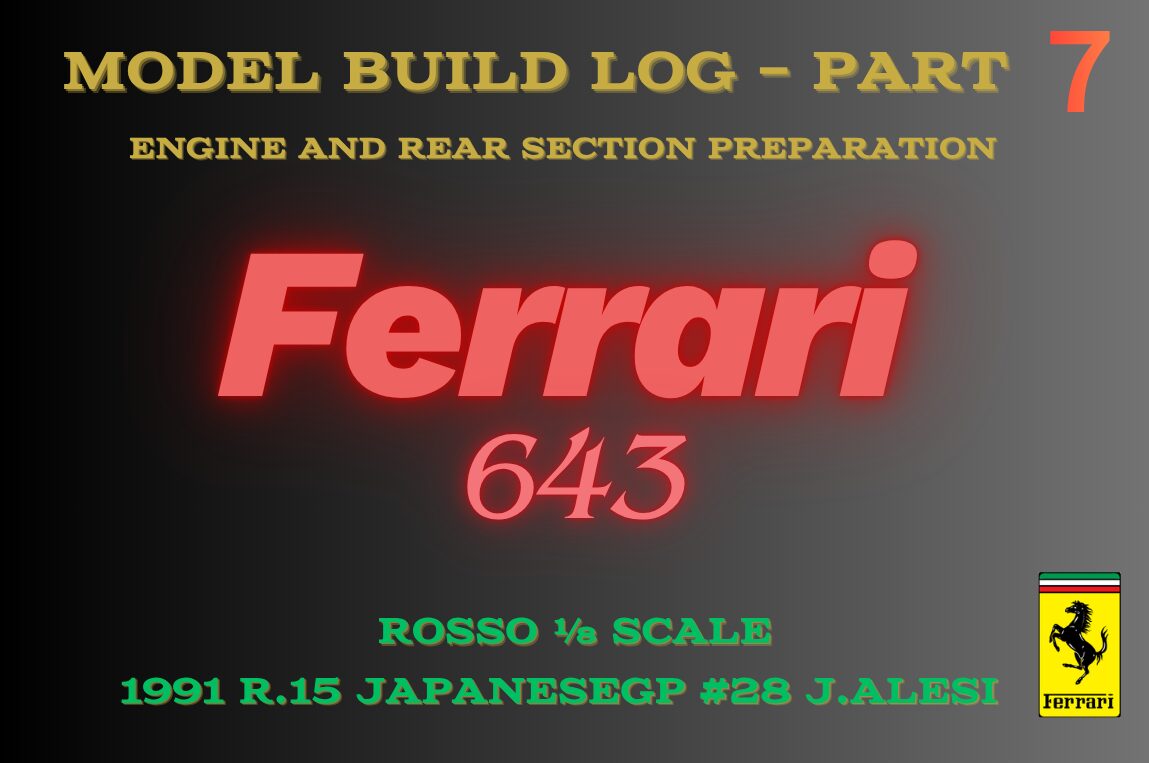
オイルタンクも改修を加えながら製作を進めていきます。
まずは全体の形状を整え、パーティングラインの除去など基本的な下地処理を行います。
The oil tank is also reworked to improve its overall appearance.
The first step is to refine the basic shape and carry out the necessary surface preparation, including the removal of mold seams.
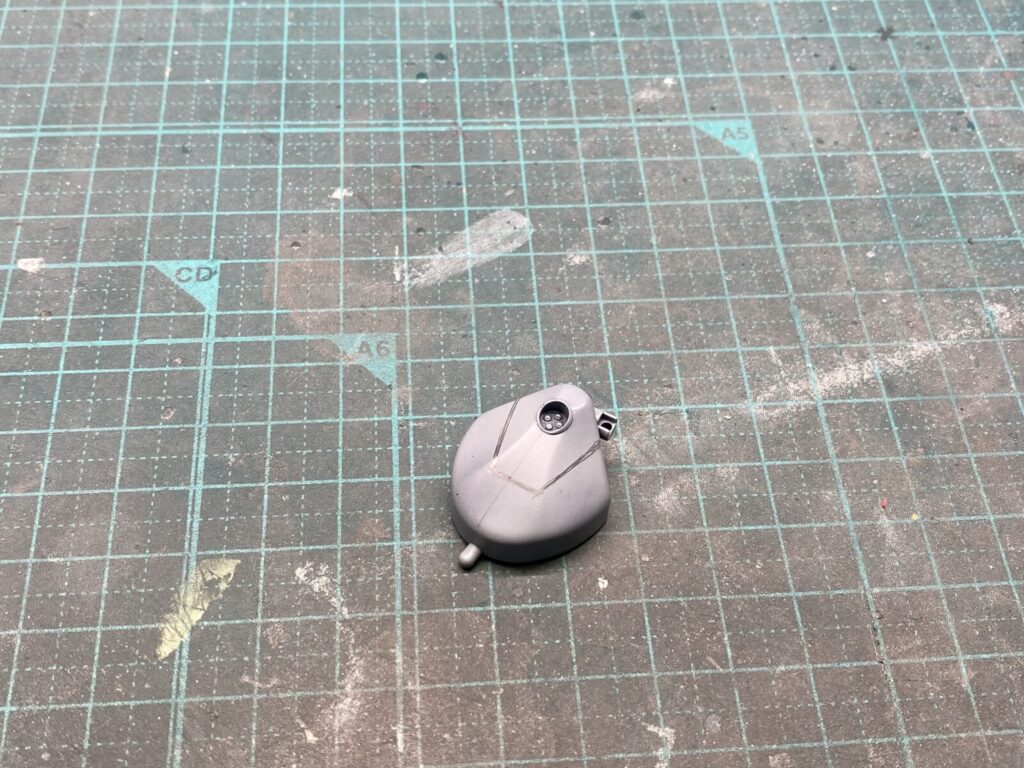
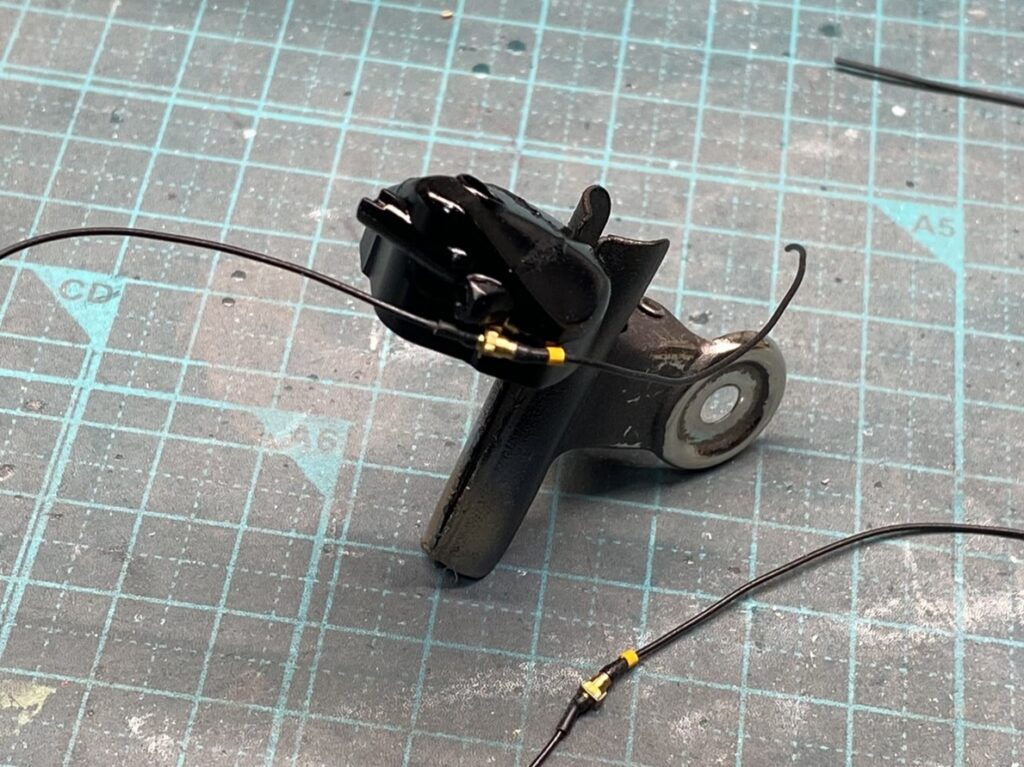
実車ではオイルタンク上面に溶接ビードが確認できるため、そのディテールを再現していきます。
仕上がりを確認するため、一旦塗装を行い、溶接ビードの見え方や全体の雰囲気をチェックします。
The top of the oil tank on the real car features visible weld beads, so these details are reproduced on the model.
To evaluate the result, the part is given a temporary coat of paint, allowing the appearance of the weld beads and the overall finish to be checked before proceeding further.
溶接ビードもイメージどおりに再現することができました。
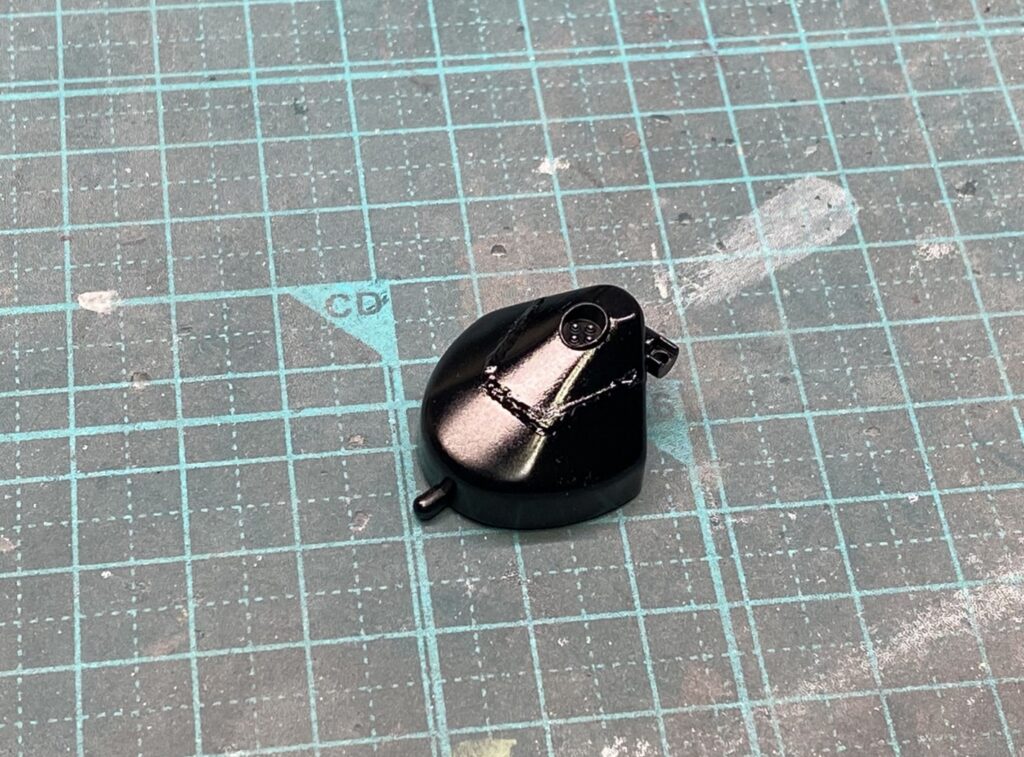
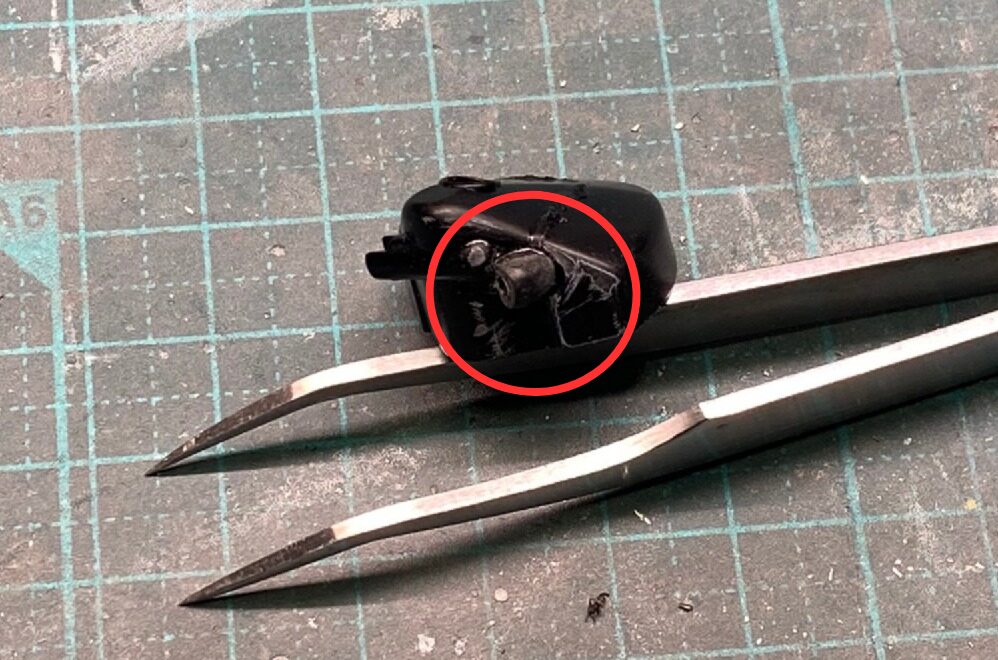
さらに、キットでは省略されているホースジョイントを追加し、ディテールアップを行います。その後、本塗装を施して仕上げていきます。
The weld beads have been reproduced just as intended.
Next, the hose fittings omitted from the kit are added to enhance the detail. Once these modifications are complete, the part receives its final paint finish.
オイルタンク周辺のコネクター類も自作し、追加していきます。
実車資料を参考に形状や配置を再現しながら、一つひとつ製作することで、周辺機器の密度感と精密感を高めていきます。
The connectors around the oil tank are also scratch-built and added.
Using reference photos of the real car, each connector is reproduced and positioned individually, adding greater realism and mechanical detail to the surrounding area.
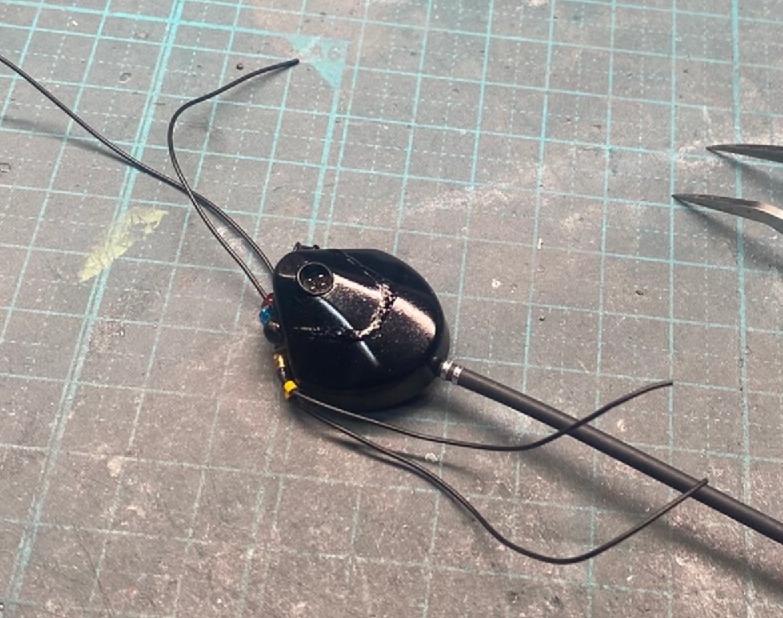
オイルタンクが完成しました。
The oil tank is now complete.
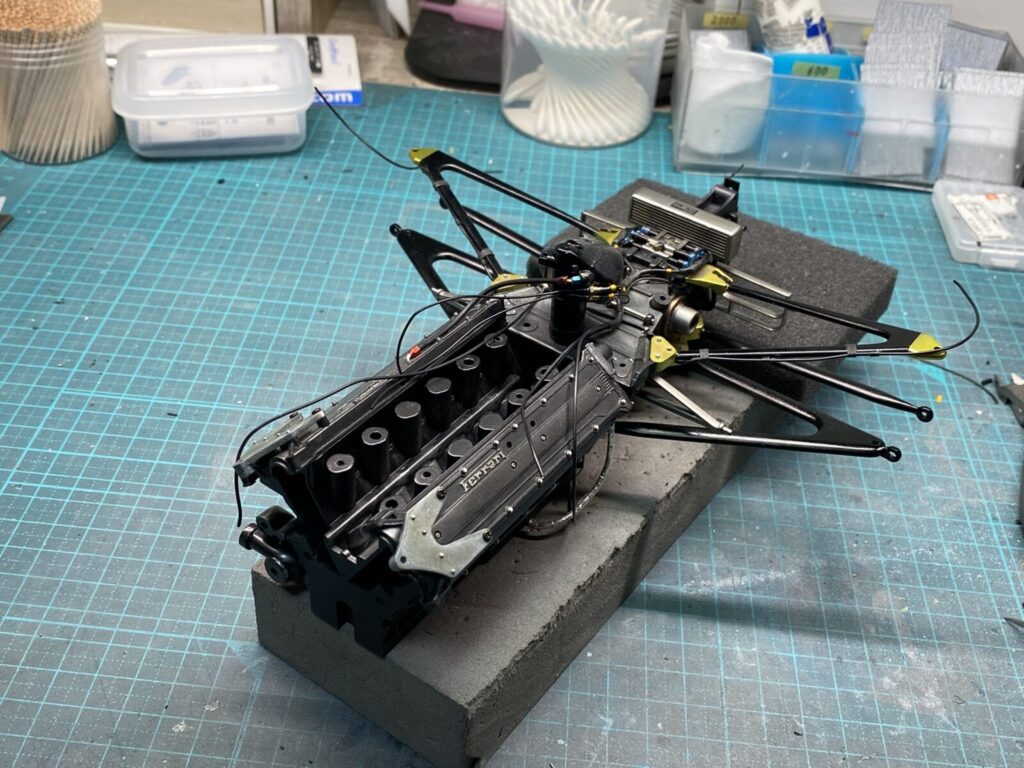
完成したオイルタンクを本体へ取り付けていきます。
各部とのクリアランスや位置関係を確認しながら慎重に組み付けを行い、実車に近いレイアウトとなるよう仕上げていきます。
The completed oil tank is then installed on the main assembly.
Careful attention is paid to the alignment and clearances during installation, ensuring the layout closely matches that of the real car.
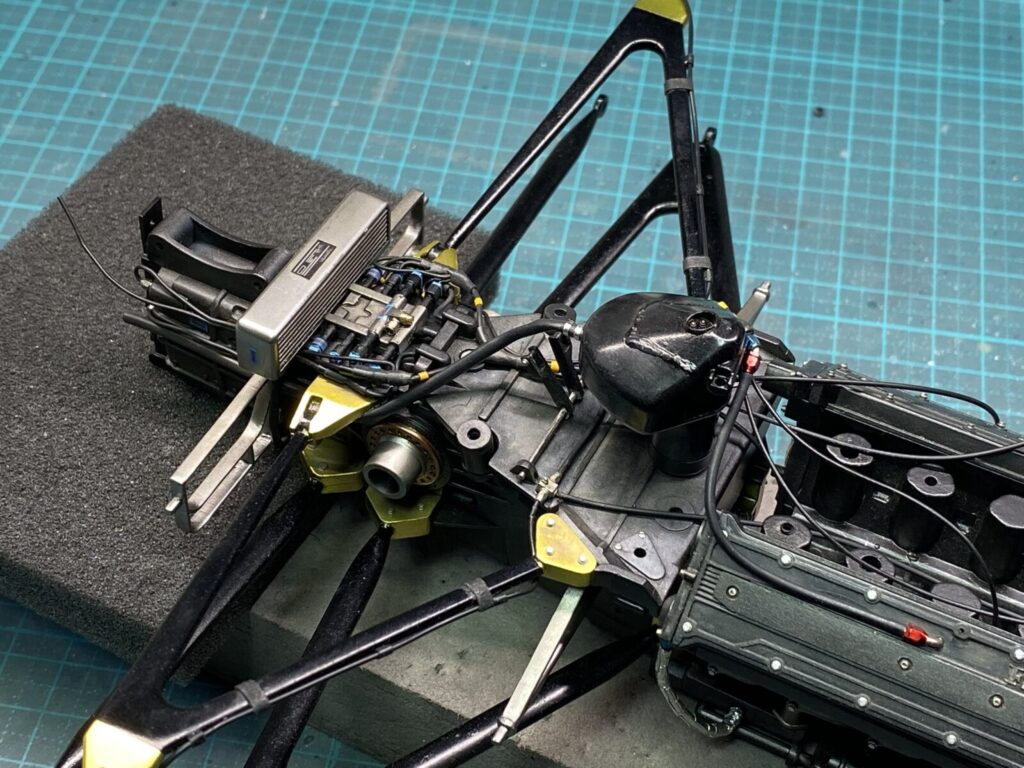
先ほど加工しておいたホースジョイントからエンジンへホースを接続していきます。
さらに各部のホースや配線も接続し、オイルタンクの取り付けはひとまず完了です。今後の工程でさらに配線や細かなディテールを追加していく予定です。
The hoses are first connected from the modified hose fittings to the engine.
The remaining hoses and wiring are then installed, bringing the oil tank installation to a temporary completion. Additional wiring and finer details will be added during the later stages of the build.