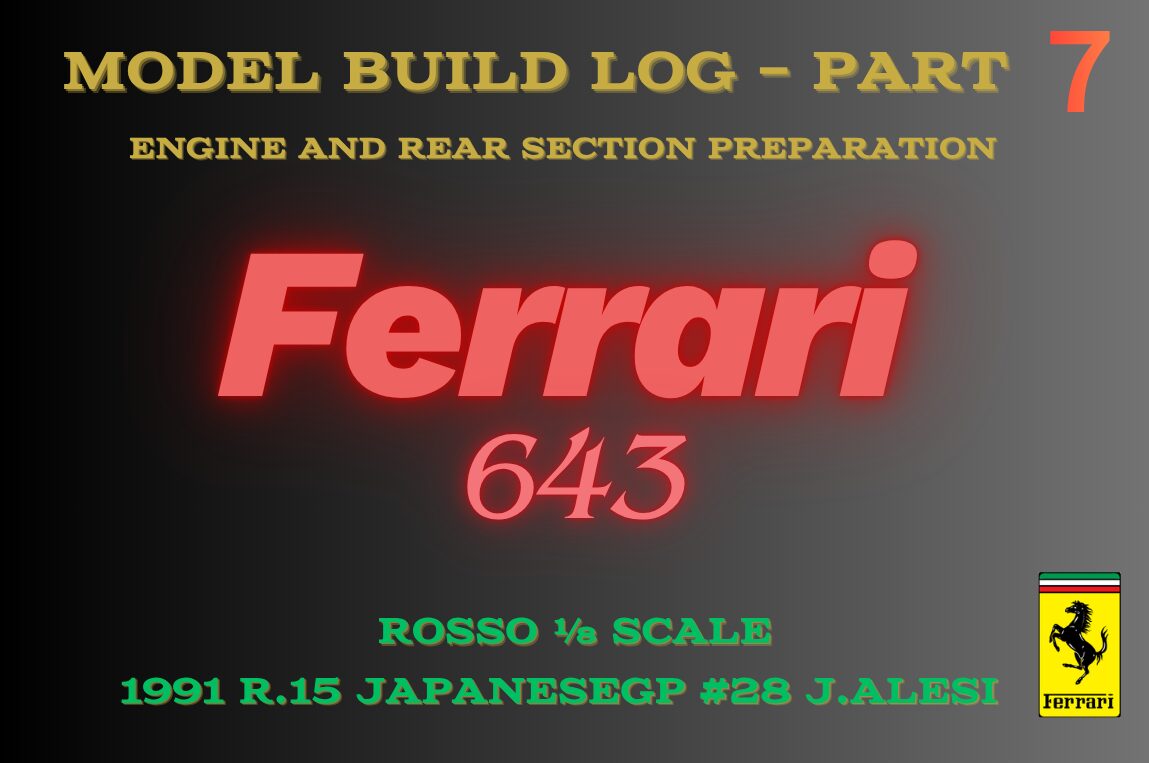
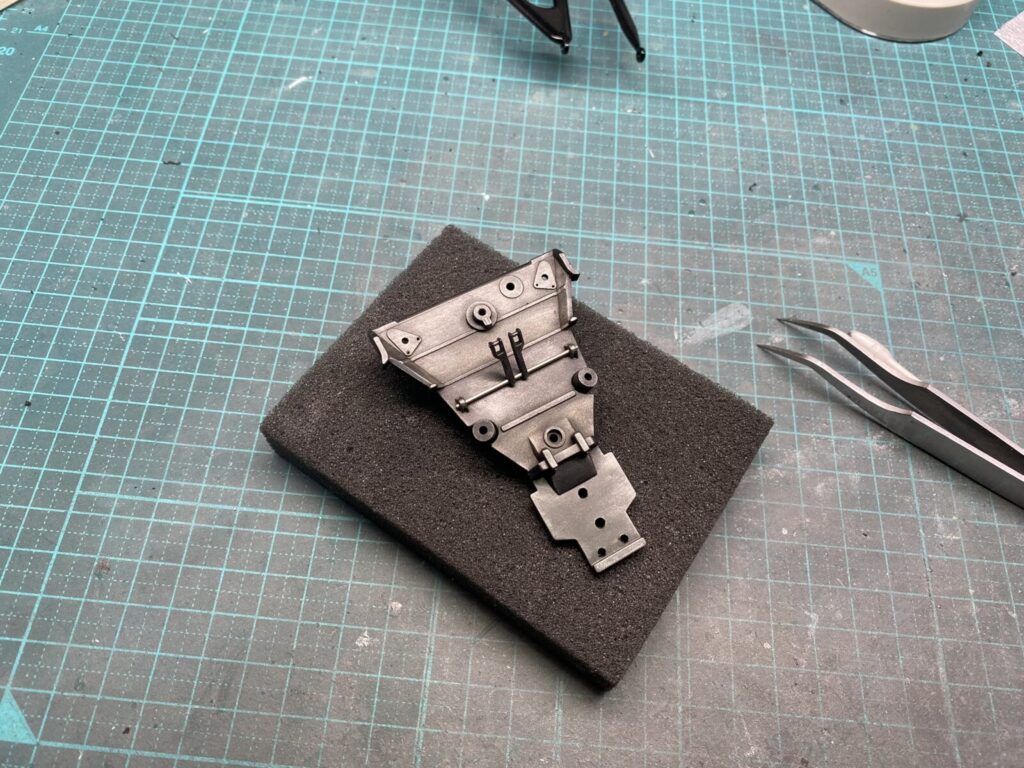
まずはアンチロールバーリンケージ機構の作り直しから着手します。
キットでは、画像のようにギアボックス上部のパネルへパーツを差し込んで固定する構造になっています。
しかし、この取り付け方法では実車の構造とは大きく異なって見えてしまいます。そこで資料を確認しながら、リンケージ機構を一から製作し直すことにしました。
The first area to be reworked is the anti-roll bar linkage assembly.
In the kit, the linkage is designed to be mounted by simply inserting the parts into the upper gearbox panel, as shown in the photo.
However, this arrangement looks quite different from the structure used on the actual car. Using reference material as a guide, I decided to rebuild the entire linkage assembly from scratch for a more accurate representation.
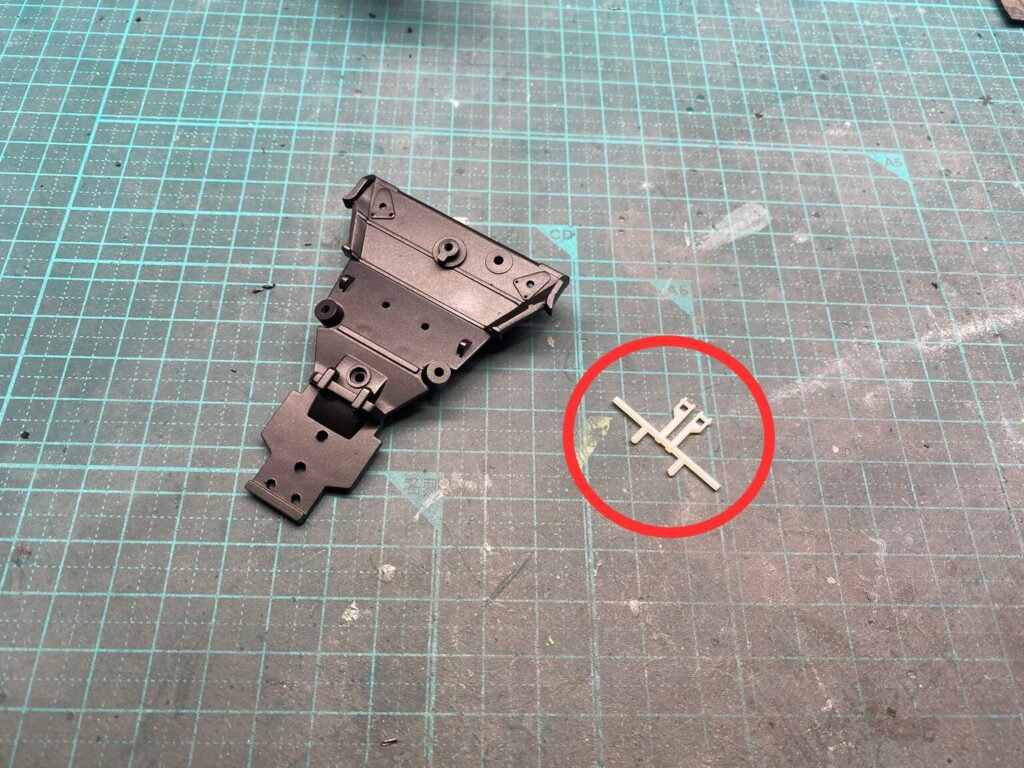
ギアボックス上部パネルに開けられている取り付け穴を埋める作業から始めます。
次に、新たに製作するアンチロールバーリンケージ機構を確実に支持できるよう、強度の高いステンレス製ロッドを組み込むための加工を行います。
Work begins by filling the mounting holes in the upper gearbox panel.
Next, the panel is modified to accept a high-strength stainless steel rod, ensuring a secure mounting point for the new anti-roll bar linkage assembly.
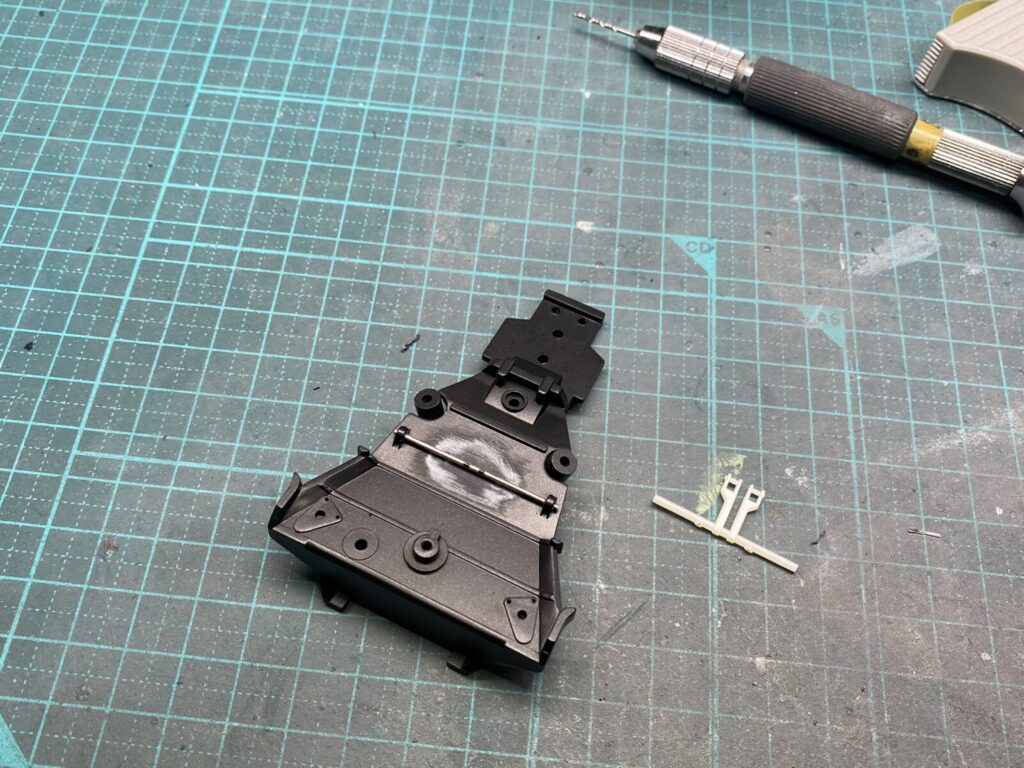
上面パネルの改修が完了したら塗装を行います。
アンチロールバーリンケージ機構のパーツは、形状や取り付け方法を見直すため、すべて新たに製作し直しました。
Once the modifications to the upper panel are complete, it is painted.
All of the anti-roll bar linkage components were rebuilt from scratch to achieve a more accurate shape and mounting arrangement.
製作したパーツをギアボックス上面パネルに取り付けます。
これでアンチロールバーリンケージ機構の改修は完了です。実車と同様にリンケージが可動する構造となり、見た目だけでなく機構面でも実車の雰囲気に近づけることができました。
The newly fabricated components are then installed on the upper gearbox panel.
With that, the anti-roll bar linkage modification is complete. The linkage is now fully functional, just as on the real car, bringing the model closer to the actual mechanism both visually and mechanically.
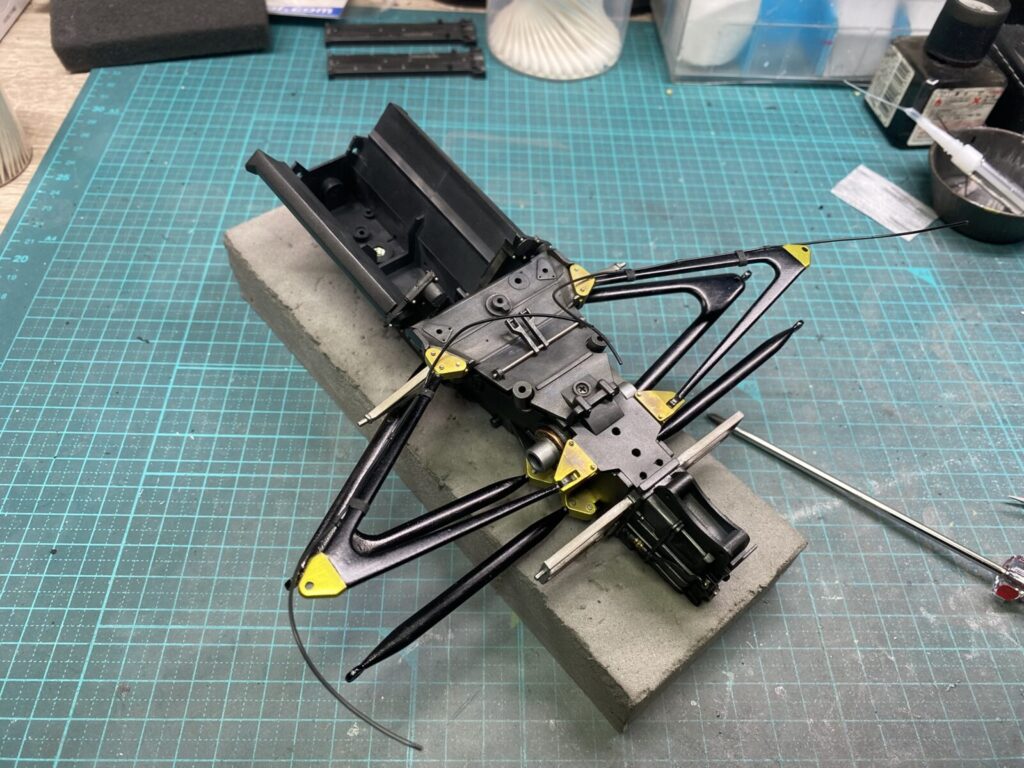
製作したギアボックス上面パネルを取り付けます。
The completed upper gearbox panel is then installed.