いよいよ製作をスタートします。
キットの組立説明書ではフロントウイングから作業を始める流れになっていますが、今回は工程を見直し、順番を変更して進めていきます。
I’m finally starting the build.
The kit instructions begin with the front wing, but for this project I’ll revise the workflow and proceed in a different order.
まず着手するのは、今回の製作の中でも特に大がかりな作業となる「塗装の剥離」です。
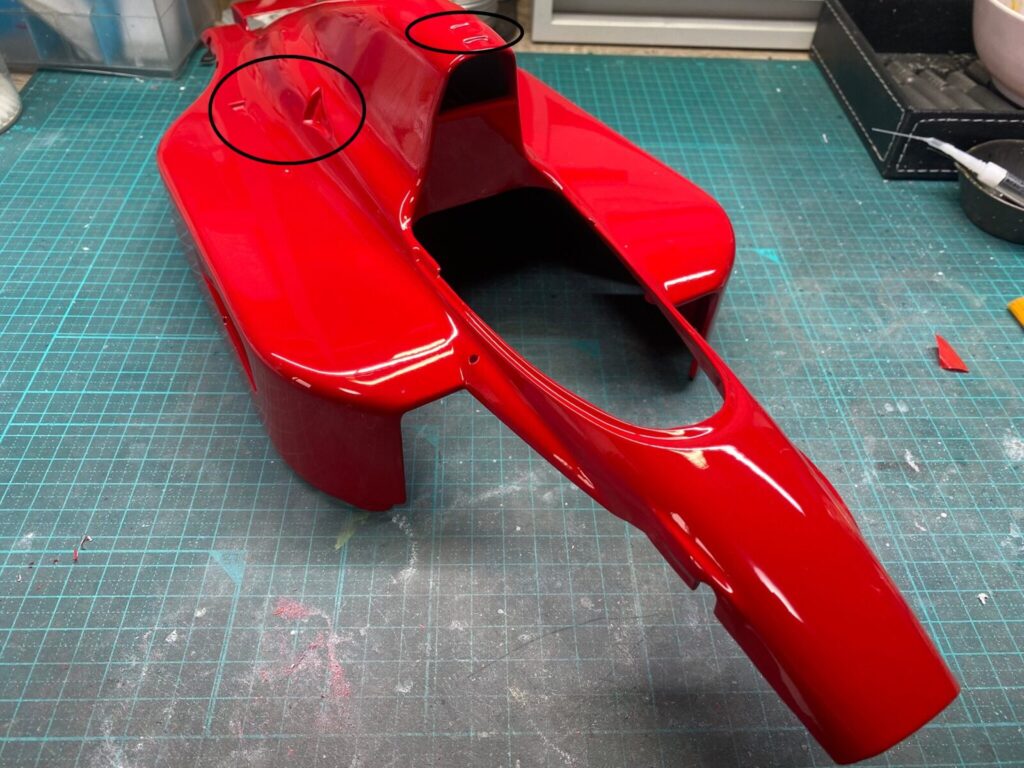
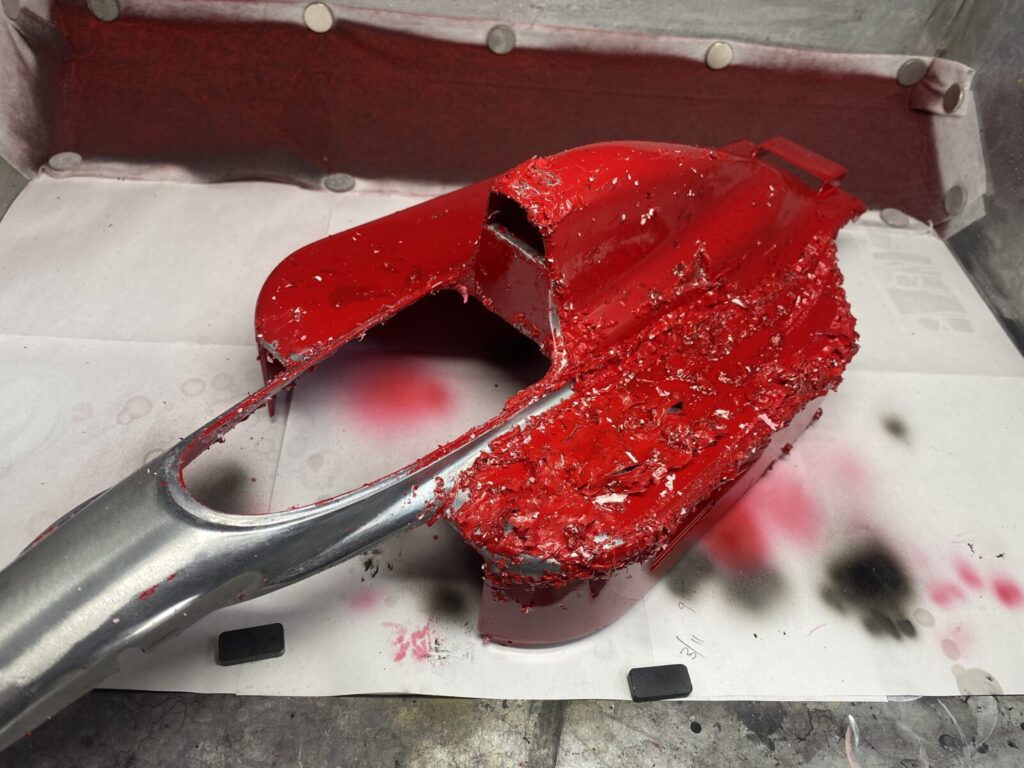
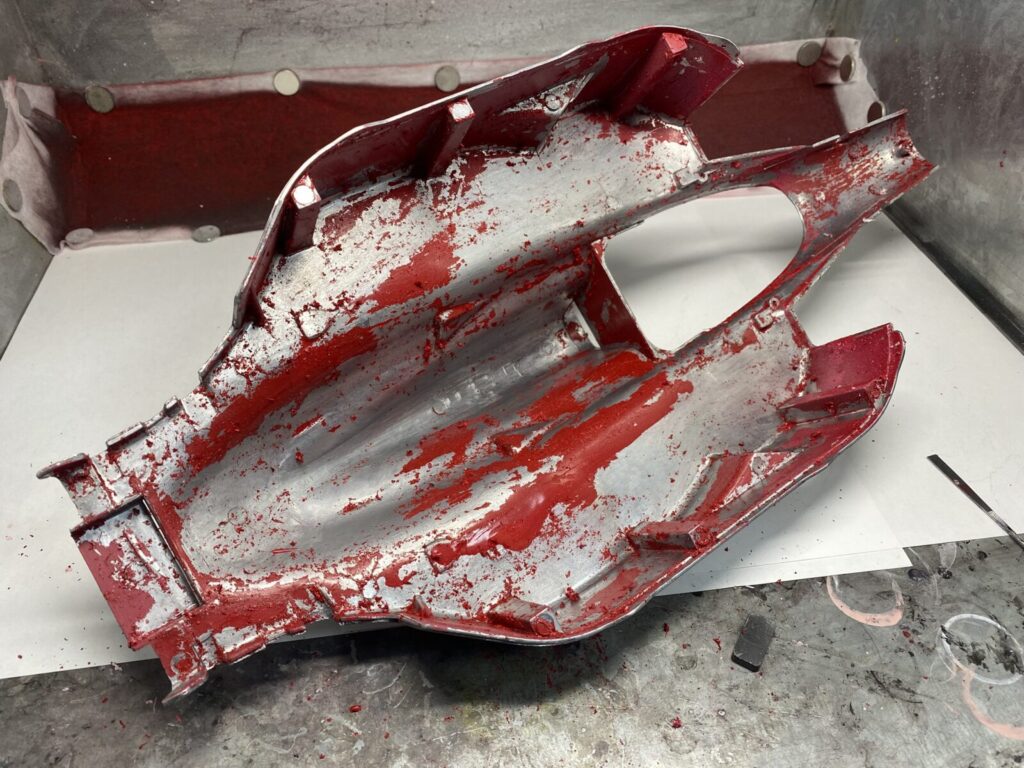
このキット最大の特徴でもあるアルミボディ表現は、非常にこだわった塗装によって再現されています。しかし、左の画像に見られるようにエアインテーク周辺のパネルには塗装の浮きが目立つ状態です。
これが経年変化によるものなのか、あるいは塗装工程に起因するものなのかは判別できませんが、いずれにしてもこのまま製作を進めることは難しいと判断しました。
The first task will be stripping the paint, which is one of the largest and most important jobs in this build.
One of the biggest features of this kit is its aluminum body finish, reproduced with a very carefully applied paint treatment. However, as seen in the photos, there is noticeable paint lifting around the air intake panels.
It is unclear whether this was caused by aging over time or by the original painting process itself, but in any case, I decided that it would be difficult to continue the build in its current condition.
さらに、1/8というビッグスケールでありながらダクト内部は塞がれており、この点も見過ごすことはできません。ダクトを開口するためには加工が必要となり、結果的に再塗装は避けられないため、ボディ全体の塗装を一度剥離してリセットする決断に至りました。
とはいえ、このキットはロボットによって非常にしっかりと塗装が施されているため、果たして塗膜をきれいに剥離できるのか——その点に一抹の不安を感じながらの作業開始となりました。
In addition, despite being a large 1/8 scale kit, the ducts are molded closed, which is another issue that cannot be ignored. Opening these ducts will require modification work, and repainting will be unavoidable, so I decided to strip all the paint from the body and start from a clean base.
That said, the kit is factory-painted by robots with a very durable finish, so there is some concern about whether the paint can be removed cleanly. With that in mind, I began the work with a bit of caution.
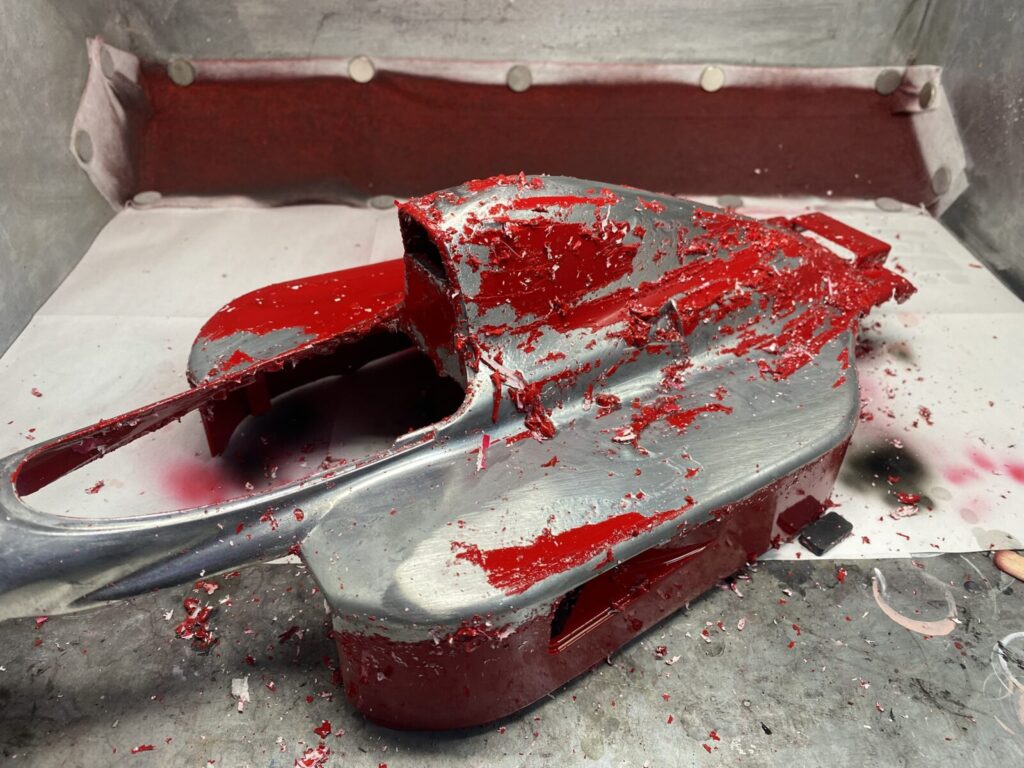
塗装の状態を確認してみると、塗膜は想像以上に厚く、非常に硬い印象を受けました。そのため、今回はやや強力な塗装剥離剤を使用することにします。
一般的に塗膜が弱い場合であれば、剥離剤を塗布して5分ほどで簡単に塗装が浮いてくるのですが、今回は5分経ってもまったく変化が見られず、塗装が落ちる気配はありません。
不安を感じつつもそのまま様子を見守り、30分以上が経過した頃、ようやく塗膜が反応し始め、少しずつ浮き上がってきました。
After checking the condition of the paint, I found that the paint layer was much thicker and harder than expected. Because of this, I decided to use a stronger paint remover for this step.
Normally, if the paint layer is weak, applying the remover will cause the paint to lift within about 5 minutes. However, in this case, even after 5 minutes there was no visible change at all.
With some concern, I continued to monitor the process, and after more than 30 minutes, the paint finally began to react and slowly started to lift.
しかし、一度で塗装がきれいに落ちることはなく、作業は思っていた以上に手間のかかるものとなりました。
柔らかくなった塗膜を丁寧に除去し、再び剥離剤を塗布して塗装を落とす――この工程を何度も繰り返しながら、少しずつ作業を進めていきます。
However, the paint did not come off cleanly in a single pass, and the process turned out to be more time-consuming than expected.
The softened paint was carefully removed, then the remover was applied again to strip more paint—this cycle was repeated many times, gradually progressing the work step by step.
それでも落としきれない部分については、カッターやペーパーを使って丁寧に削ぎ落としていきます。
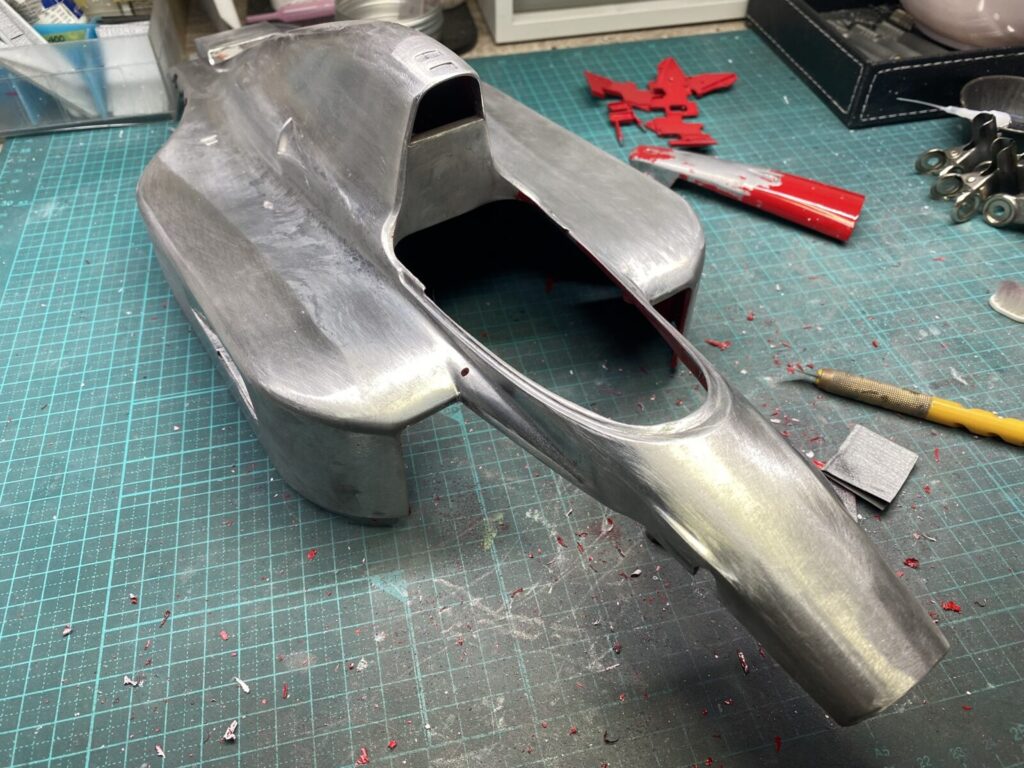
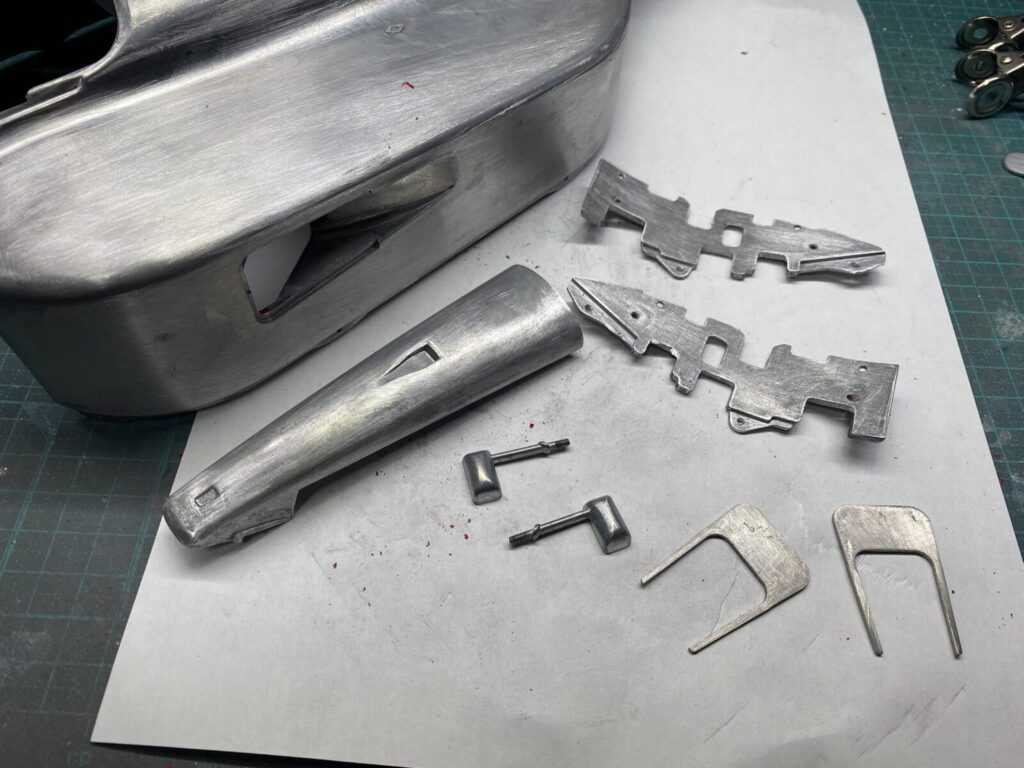
そうした地道な作業を重ねた結果、まずは表面の塗装については、何とか無事に剥離を終えることができました。
For any areas where the paint still could not be fully removed, I carefully scraped it away using a knife and sanding paper.
After repeating this kind of meticulous work, I was finally able to complete the paint removal on the surface.
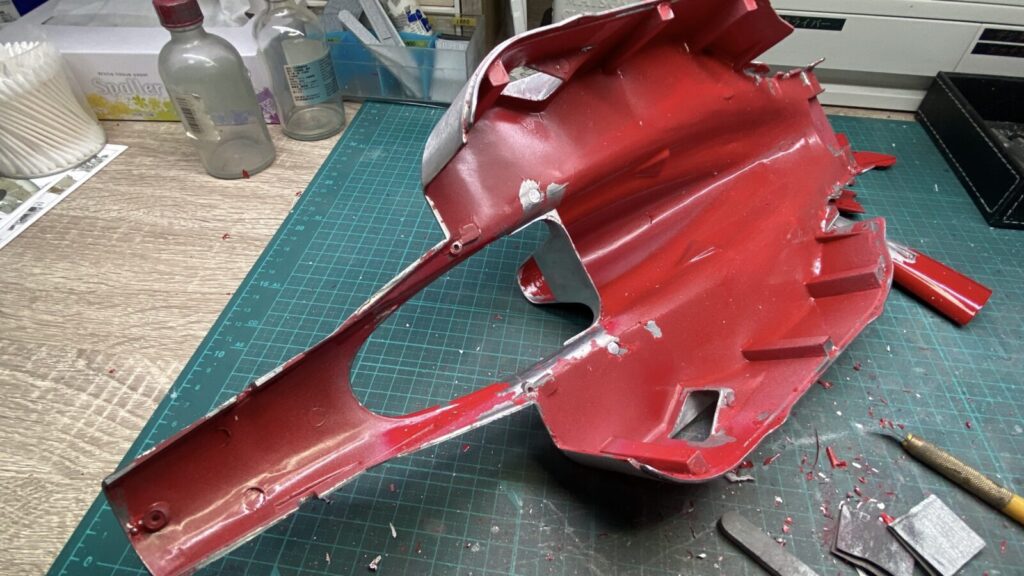
続いて、内側についても同様に塗装の剥離を行っていきます。
Next, I moved on to the inner surfaces and began stripping the paint in the same way.
内側の塗膜は外側ほど厚くはありませんが、それでも剥離にはかなりの時間を要しました。
The paint layer on the inside is not as thick as on the exterior, but even so, removing it still took a considerable amount of time.
塗膜は予想以上に硬く、ボディにも非常に強く密着していたため、剥離作業は想定よりも手間のかかるものとなりました。ですが、数日かけて作業を進め、すべてのパーツの塗装を無事に剥がすことができました。
これで、製作前に懸念していた工程の一つをクリアすることができました。
次回は「ダクトの開口加工」についてご紹介します。
The paint film was harder than expected and had adhered very firmly to the body, so stripping it turned out to be more time-consuming than anticipated. However, after several days of work, I was able to successfully remove the paint from all parts.
This clears one of the steps I had been concerned about before starting the build.
Next, I’ll cover the duct opening modifications.