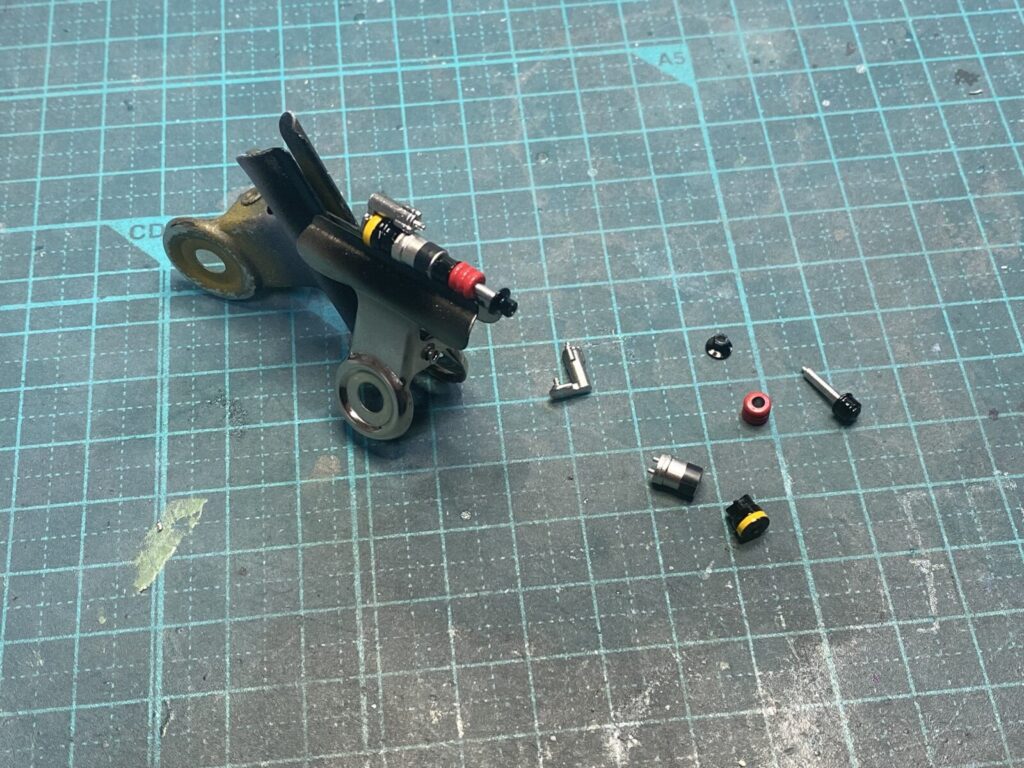
次に、ギアボックス上部のロッカーアームとダンパー周辺の組み立てを行います。
Next, the rocker arms and the damper assembly on top of the gearbox are assembled.

組み立てたパーツをギアボックス上部へ取り付けていきます。
The assembled components are then installed on top of the gearbox.
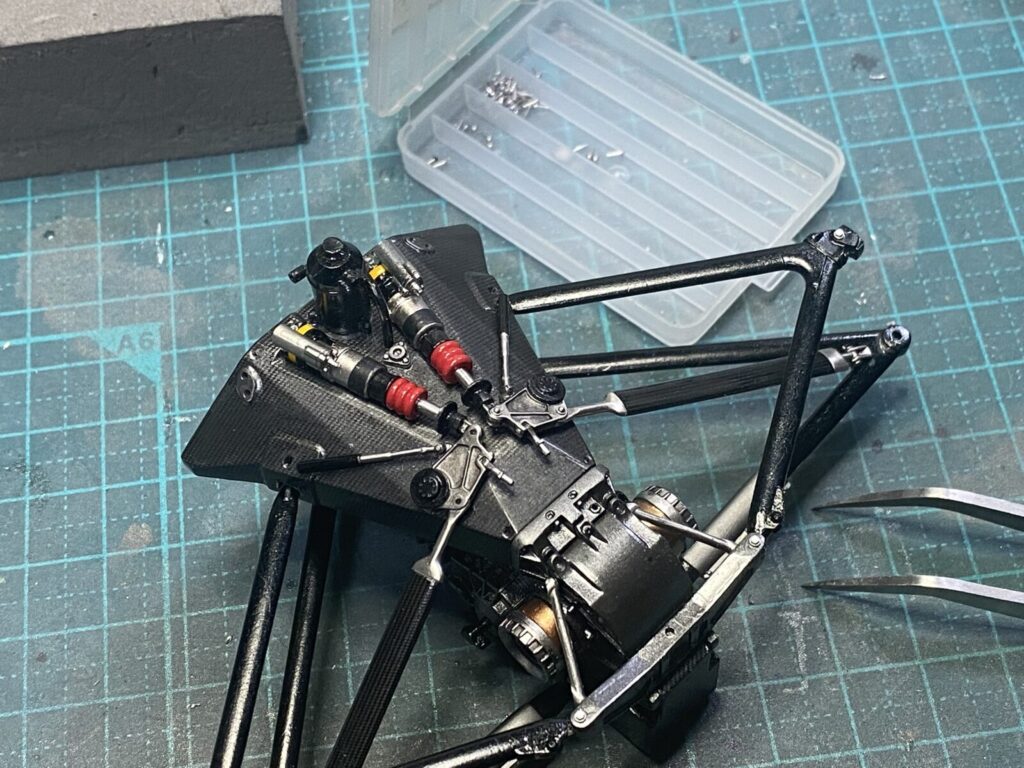
削り取って加工した部分に、ディテールを復元するためボルトやリベットを追加します。
Bolts and rivets are added to the machined areas to restore the details.
プッシュロッド後方にあるトーリンクも、位置や角度に注意しながら取り付けていきます。
The toe links located behind the pushrod are installed while carefully checking their alignment and angle.
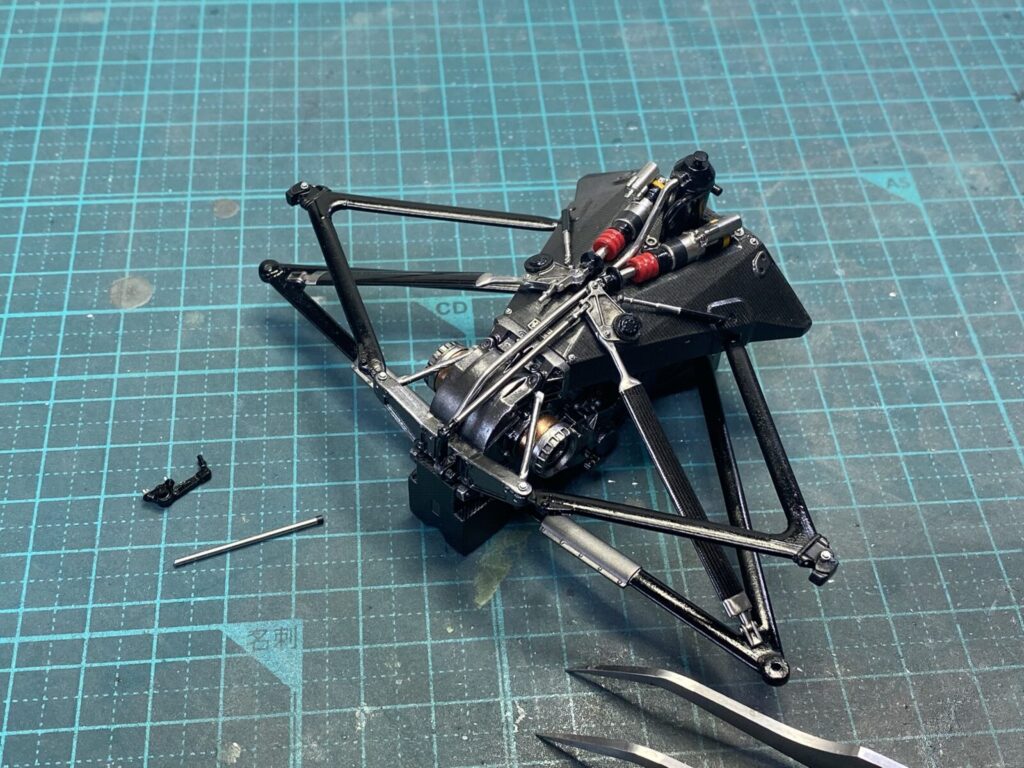
リアセクションをアンダートレイに仮置きし、サスペンションアームのアライメントを再度確認しながら調整を行います。
Temporarily place the rear section on the undertray, and adjust it while rechecking the alignment of the suspension arms.
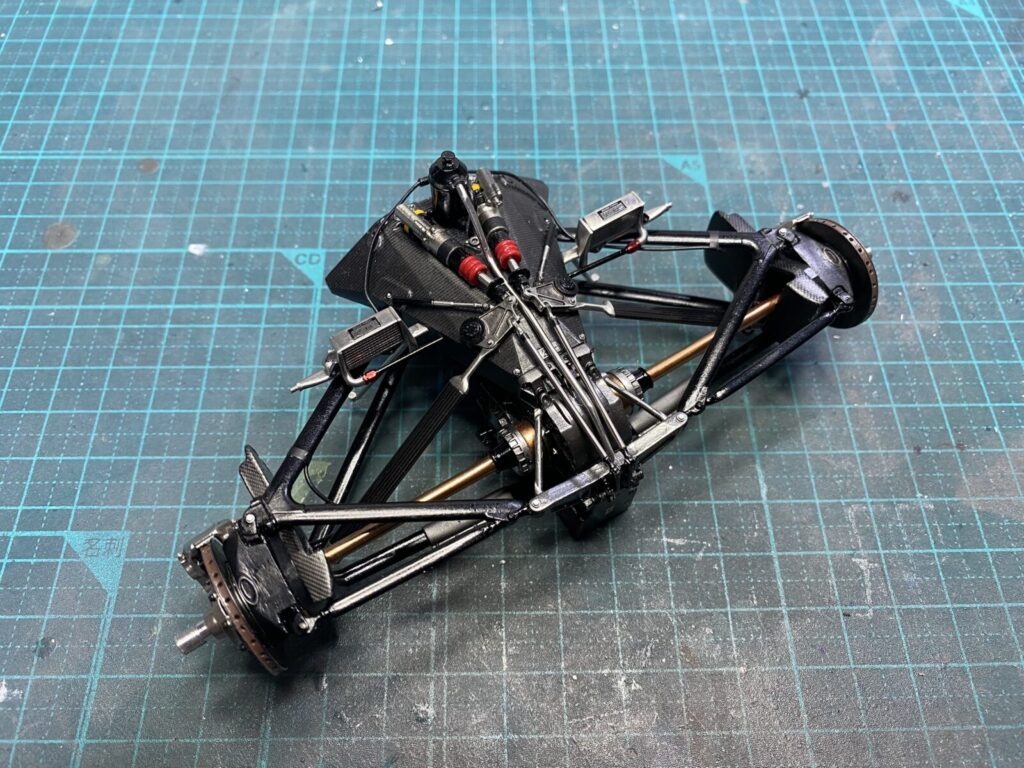
最後にブレーキホースを接続し、この工程は一旦完成です。
Finally, connect the brake hoses, and this step is complete for now.
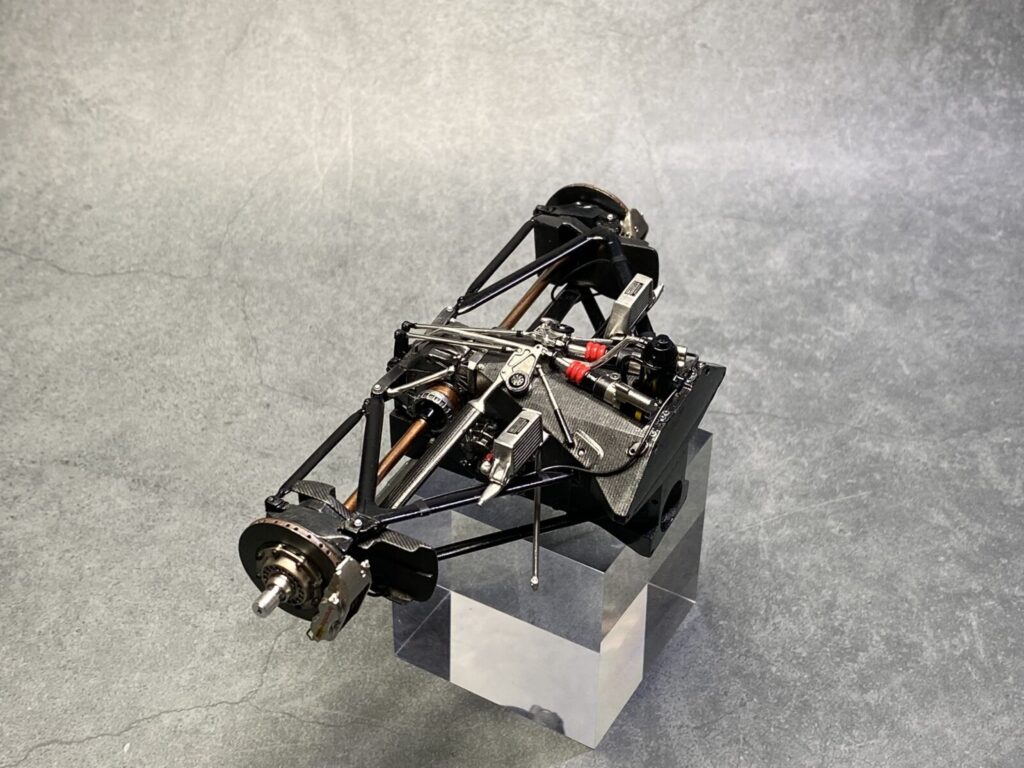
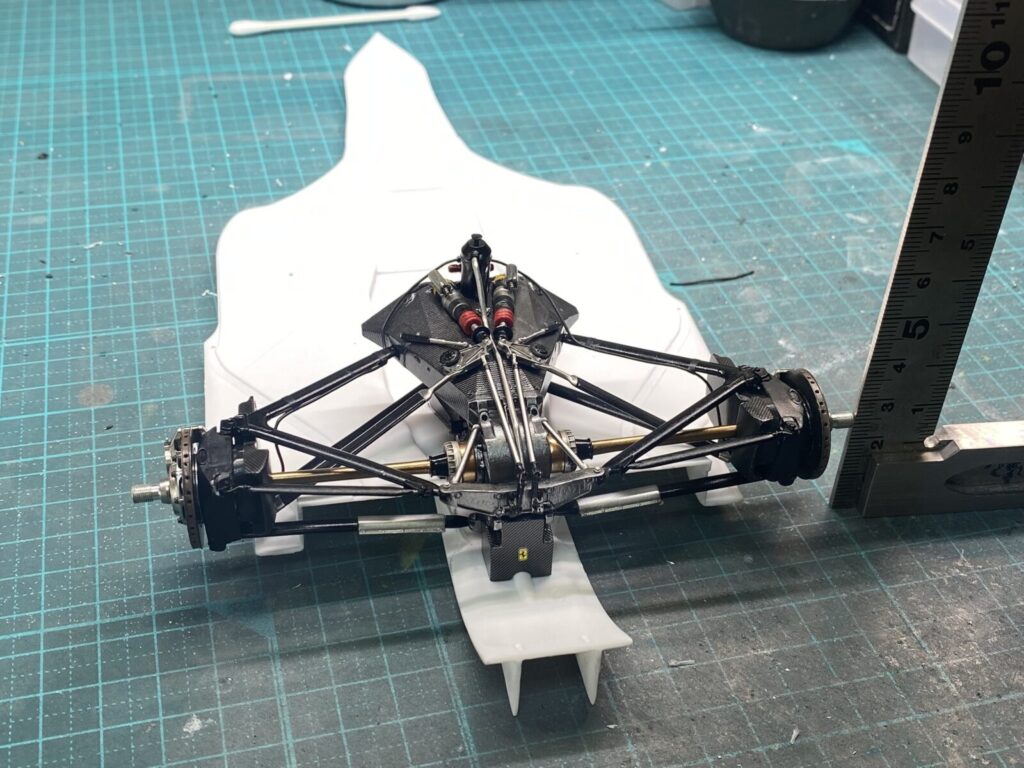
リアセクションの組み立てが完了しました。
リアセクション完成画像1
The rear section assembly is now complete.
Rear Section Completed – Photo 1
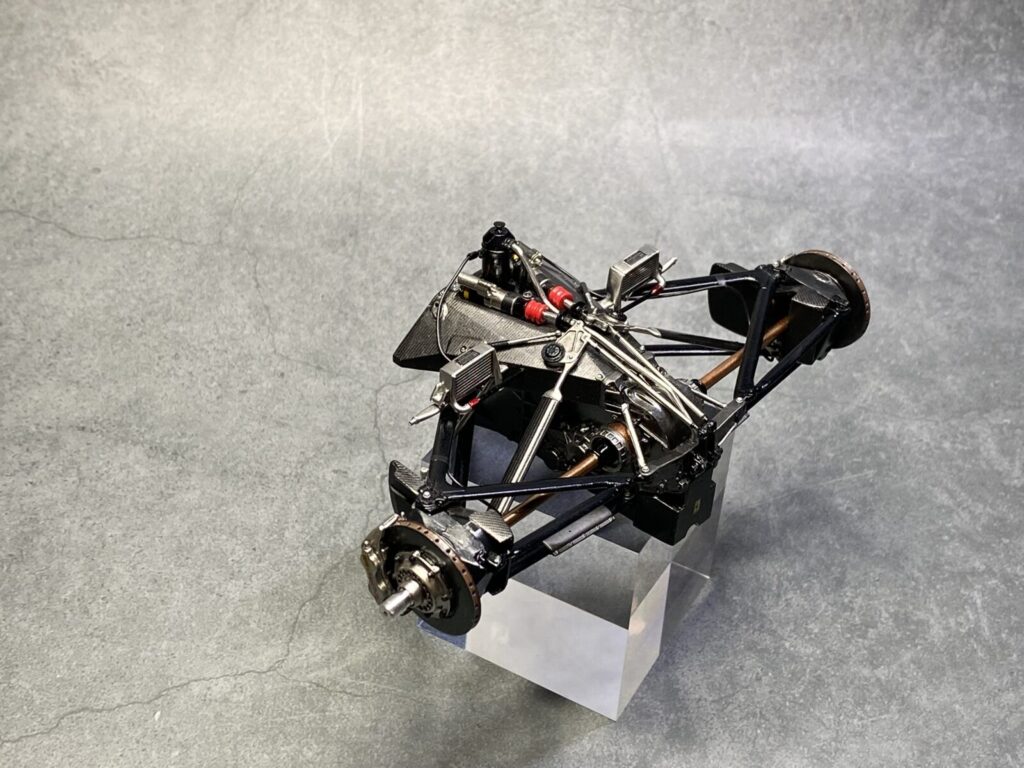
リアセクション完成画像2
Rear Section Completed – Photo 2